基础安装配置请参考官网或者ELK 分类下其他教程示例
nginx
- nginx.conf
指定日志格式如下:
http {
    log_format  main  '$remote_addr - $remote_user [$time_local] "$request" '
                      '$status $body_bytes_sent "$http_referer" '
                      '"$http_user_agent" "$http_x_forwarded_for"';

    log_format jsonTest '{"@timestamp":"$time_iso8601",'
                  '"host":"$server_addr",'
                  '"service":"nginxTest",'
                  '"trace":"$upstream_http_ctx_transaction_id",'
                  '"log":"log",'
                  '"clientip":"$remote_addr",'
                  '"remote_user":"$remote_user",'
                  '"request":"$request",'
                  '"http_user_agent":"$http_user_agent",'
                  '"size":$body_bytes_sent,'
                  '"responsetime":$request_time,'
                  '"upstreamtime":"$upstream_response_time",'
                  '"upstreamhost":"$upstream_addr",'
                  '"http_host":"$host",'
                  '"url":"$uri",'
                  '"domain":"$host",'
                  '"xff":"$http_x_forwarded_for",'
                  '"referer":"$http_referer",'
                  '"status":"$status"}';

    access_log  /var/log/nginx/access.log  jsonTest;
elasticsearch
模板配置
template01
- 没有配置mapping 不指定字段类型
{
  "order": 0,
  "index_patterns": [
    "nginxlog-*"
  ],
  "settings": {
    "index": {
      "refresh_interval": "60s",
      "number_of_shards": "1",
      "auto_expand_replicas": "0-1",
      "number_of_replicas": "1"
    }
  },
  "mappings": {},
  "aliases": {}
}
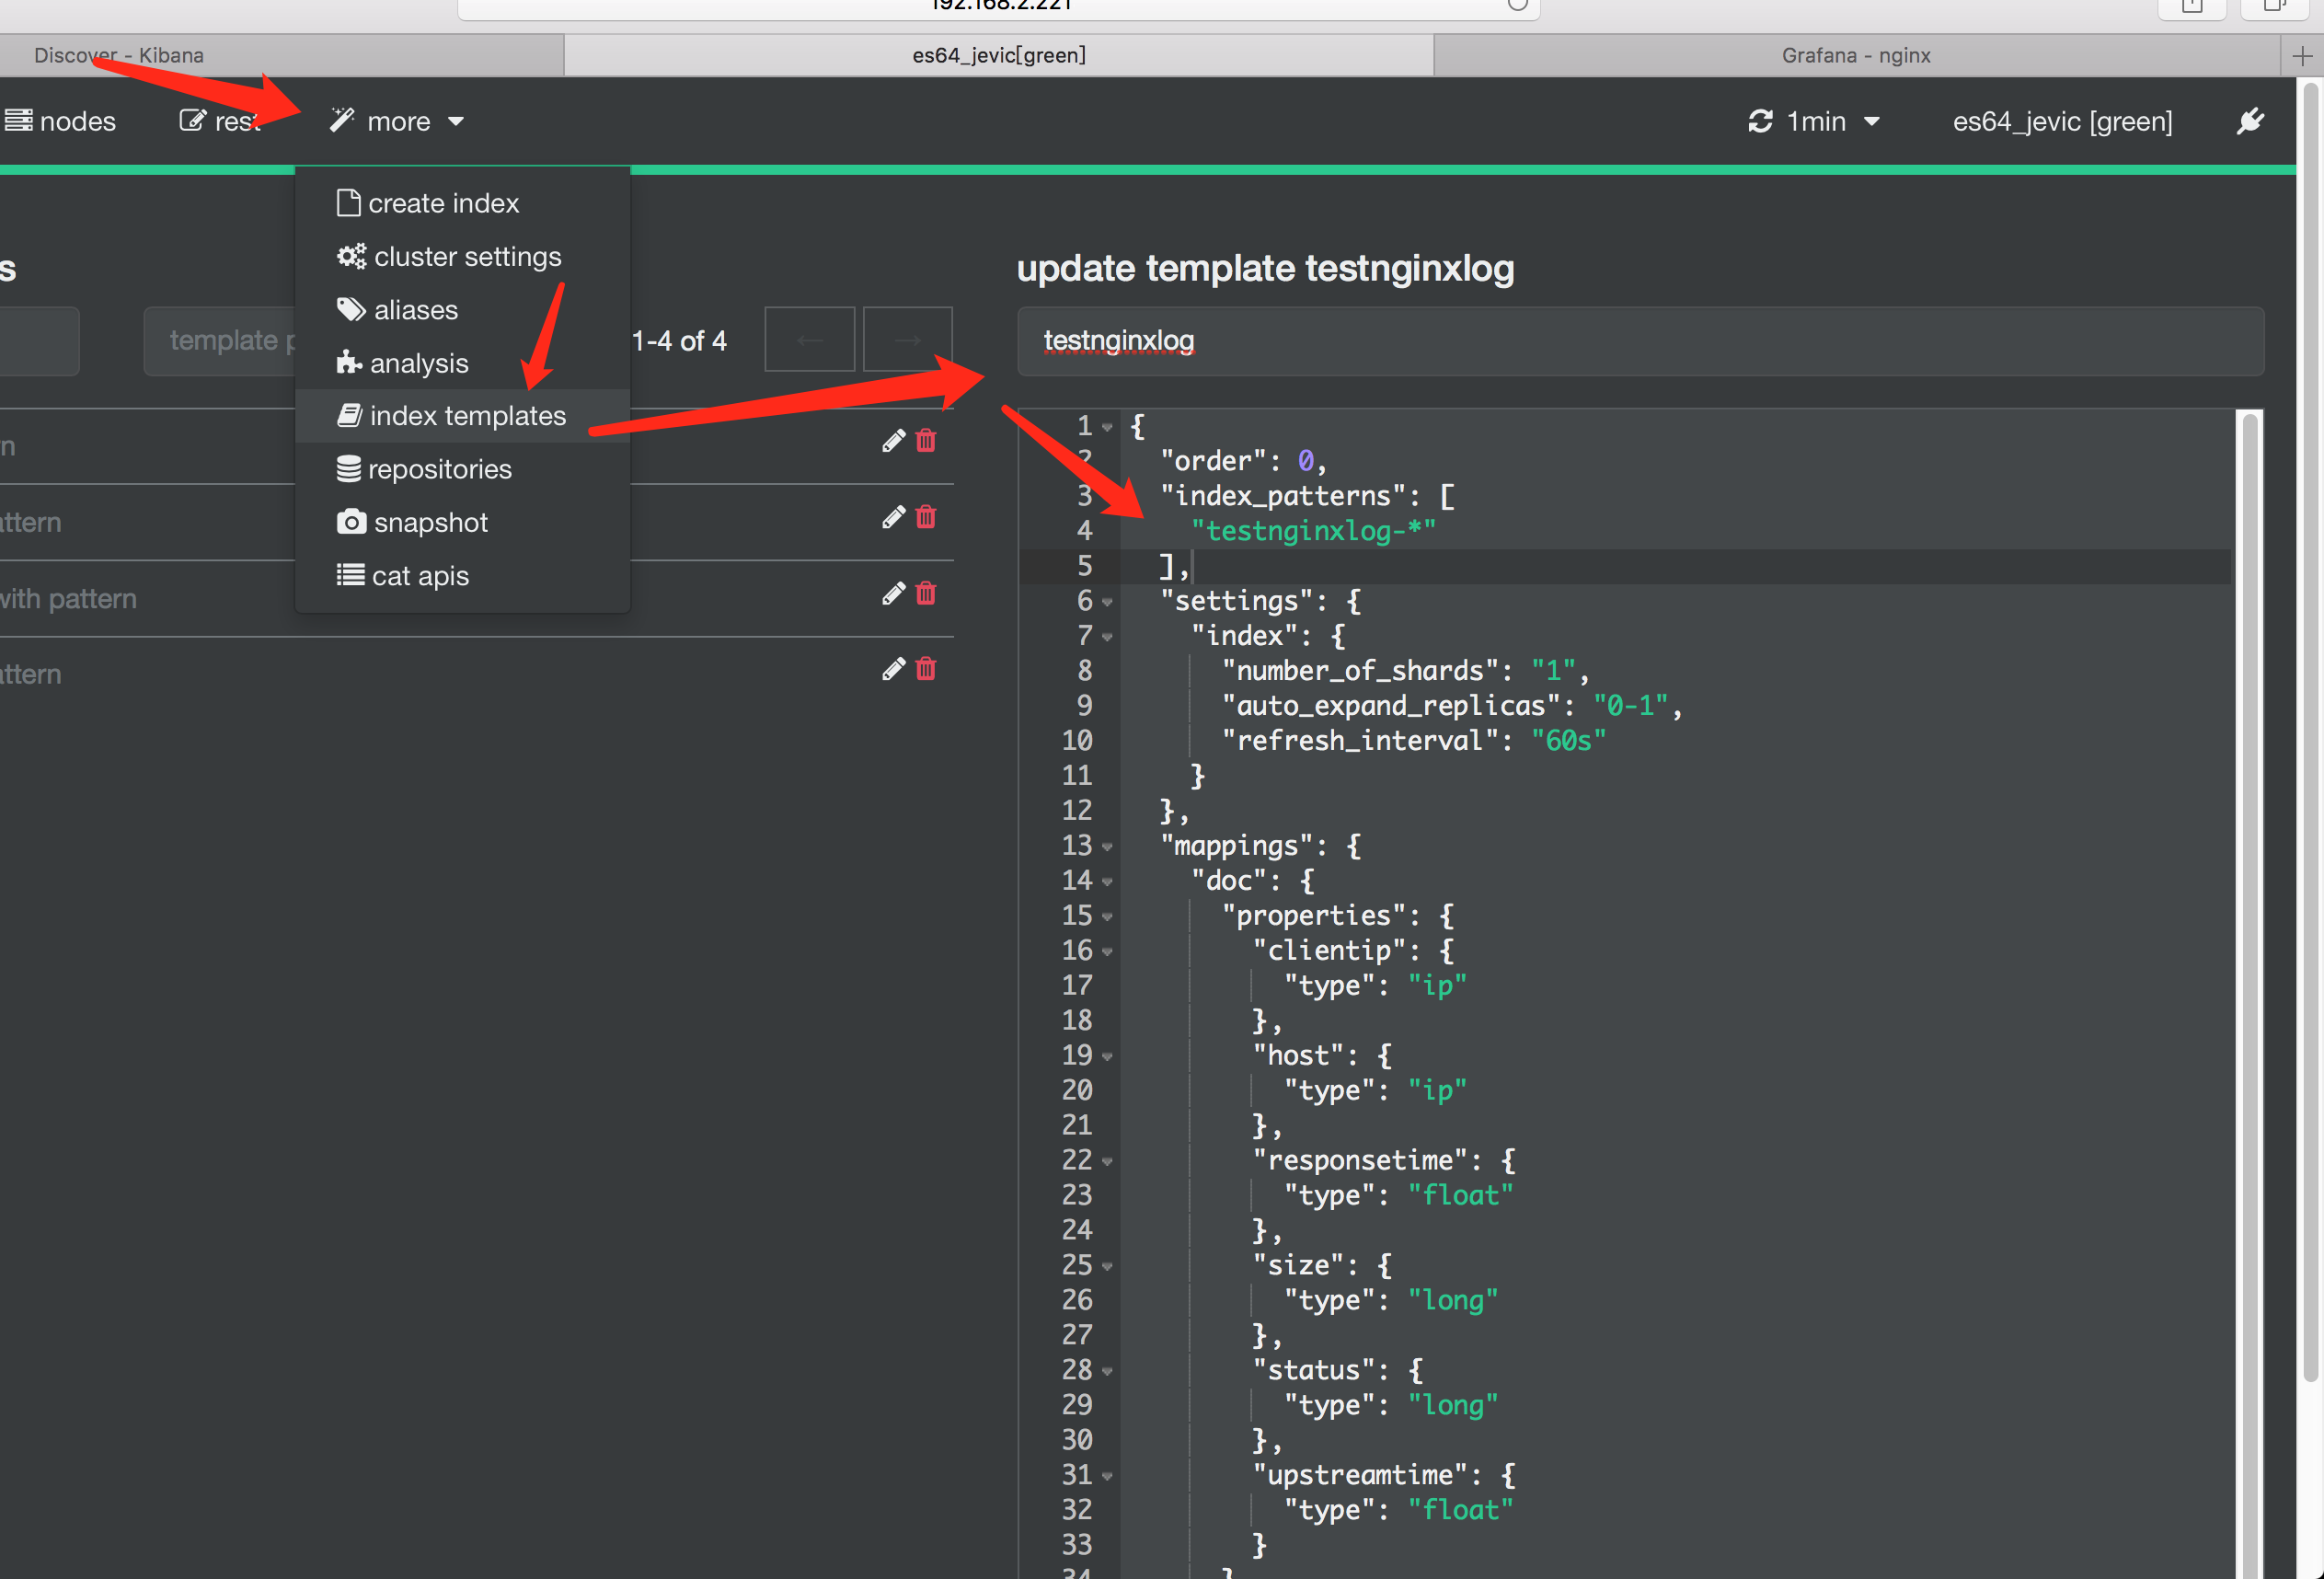
template02
- 配置mapping 指定字段类型
{
  "order": 0,
  "index_patterns": [
    "testnginxlog-*"
  ],
  "settings": {
    "index": {
      "number_of_shards": "1",
      "auto_expand_replicas": "0-1",
      "refresh_interval": "60s"
    }
  },
  "mappings": {
    "doc": {
    "dynamic":true,
      "properties": {
        "clientip": {
          "type": "ip"
        },
        "host": {
          "type": "ip"
        },
        "responsetime": {
          "type": "float"
        },
        "size": {
          "type": "long"
        },
        "status": {
          "type": "long"
        },
        "upstreamtime": {
          "type": "float",
          "index": false
        }
      }
    }
  },
  "aliases": {}
}
- 通过dynamic 参数来控制字段的新增
- true(默认) 允许自动新增字段
- false 不允许新增字段,但文档可以正常写入,但无法对字段进行查询等操作
- strict 文档不能写入,报错
- index
- 控制当前字段是否索引,默认为true,记录索引,false不记录,不可搜索
- 当索引的某些字段不需要被查询搜索时可标记index 为false,以此来减少存储空间(没有倒排索引)
logstash
- 示例中给出了两个索引名称,分别为:
- nginxlog_*
- testnginxlog-*
- 创建两个配置文件,修改对应的索引名称即可
input {
   file {
    type => "proxys"
    path => ["/var/log/nginx/access.log"]
    add_field => { "sip" => "192.168.2.243" }
    ## 是否从头读取数据这里注释掉只读取最新数据
#    start_position => "beginning"
#    sincedb_path => "/dev/null"
#    ignore_older => "99999999999"
    codec => "json"
  }
}

filter {
date {
        match => ["timestamp","UNIX"]
        target => "@timestamp"
 }
#mutate {
#        remove_field => ["path","host","tags","message"]
#}
}

output{
        elasticsearch {
        hosts => ["http://192.168.2.221:9200"]
        #index => "nginxlog_%{+YYYY.MM.dd}"
        index => "testnginxlog-%{+YYYY.MM.dd}"
    }
 #      stdout {
 #           codec => rubydebug
 #      }
}
启动进程
$LOGSTAH_PATH/bin/logstash -f nginxlog.conf --log.level=info --path.data=/tmp/nginxlog

$LOGSTAH_PATH/bin/logstash -f testnginxlog.conf --log.level=info --path.data=/tmp/testnginxlog
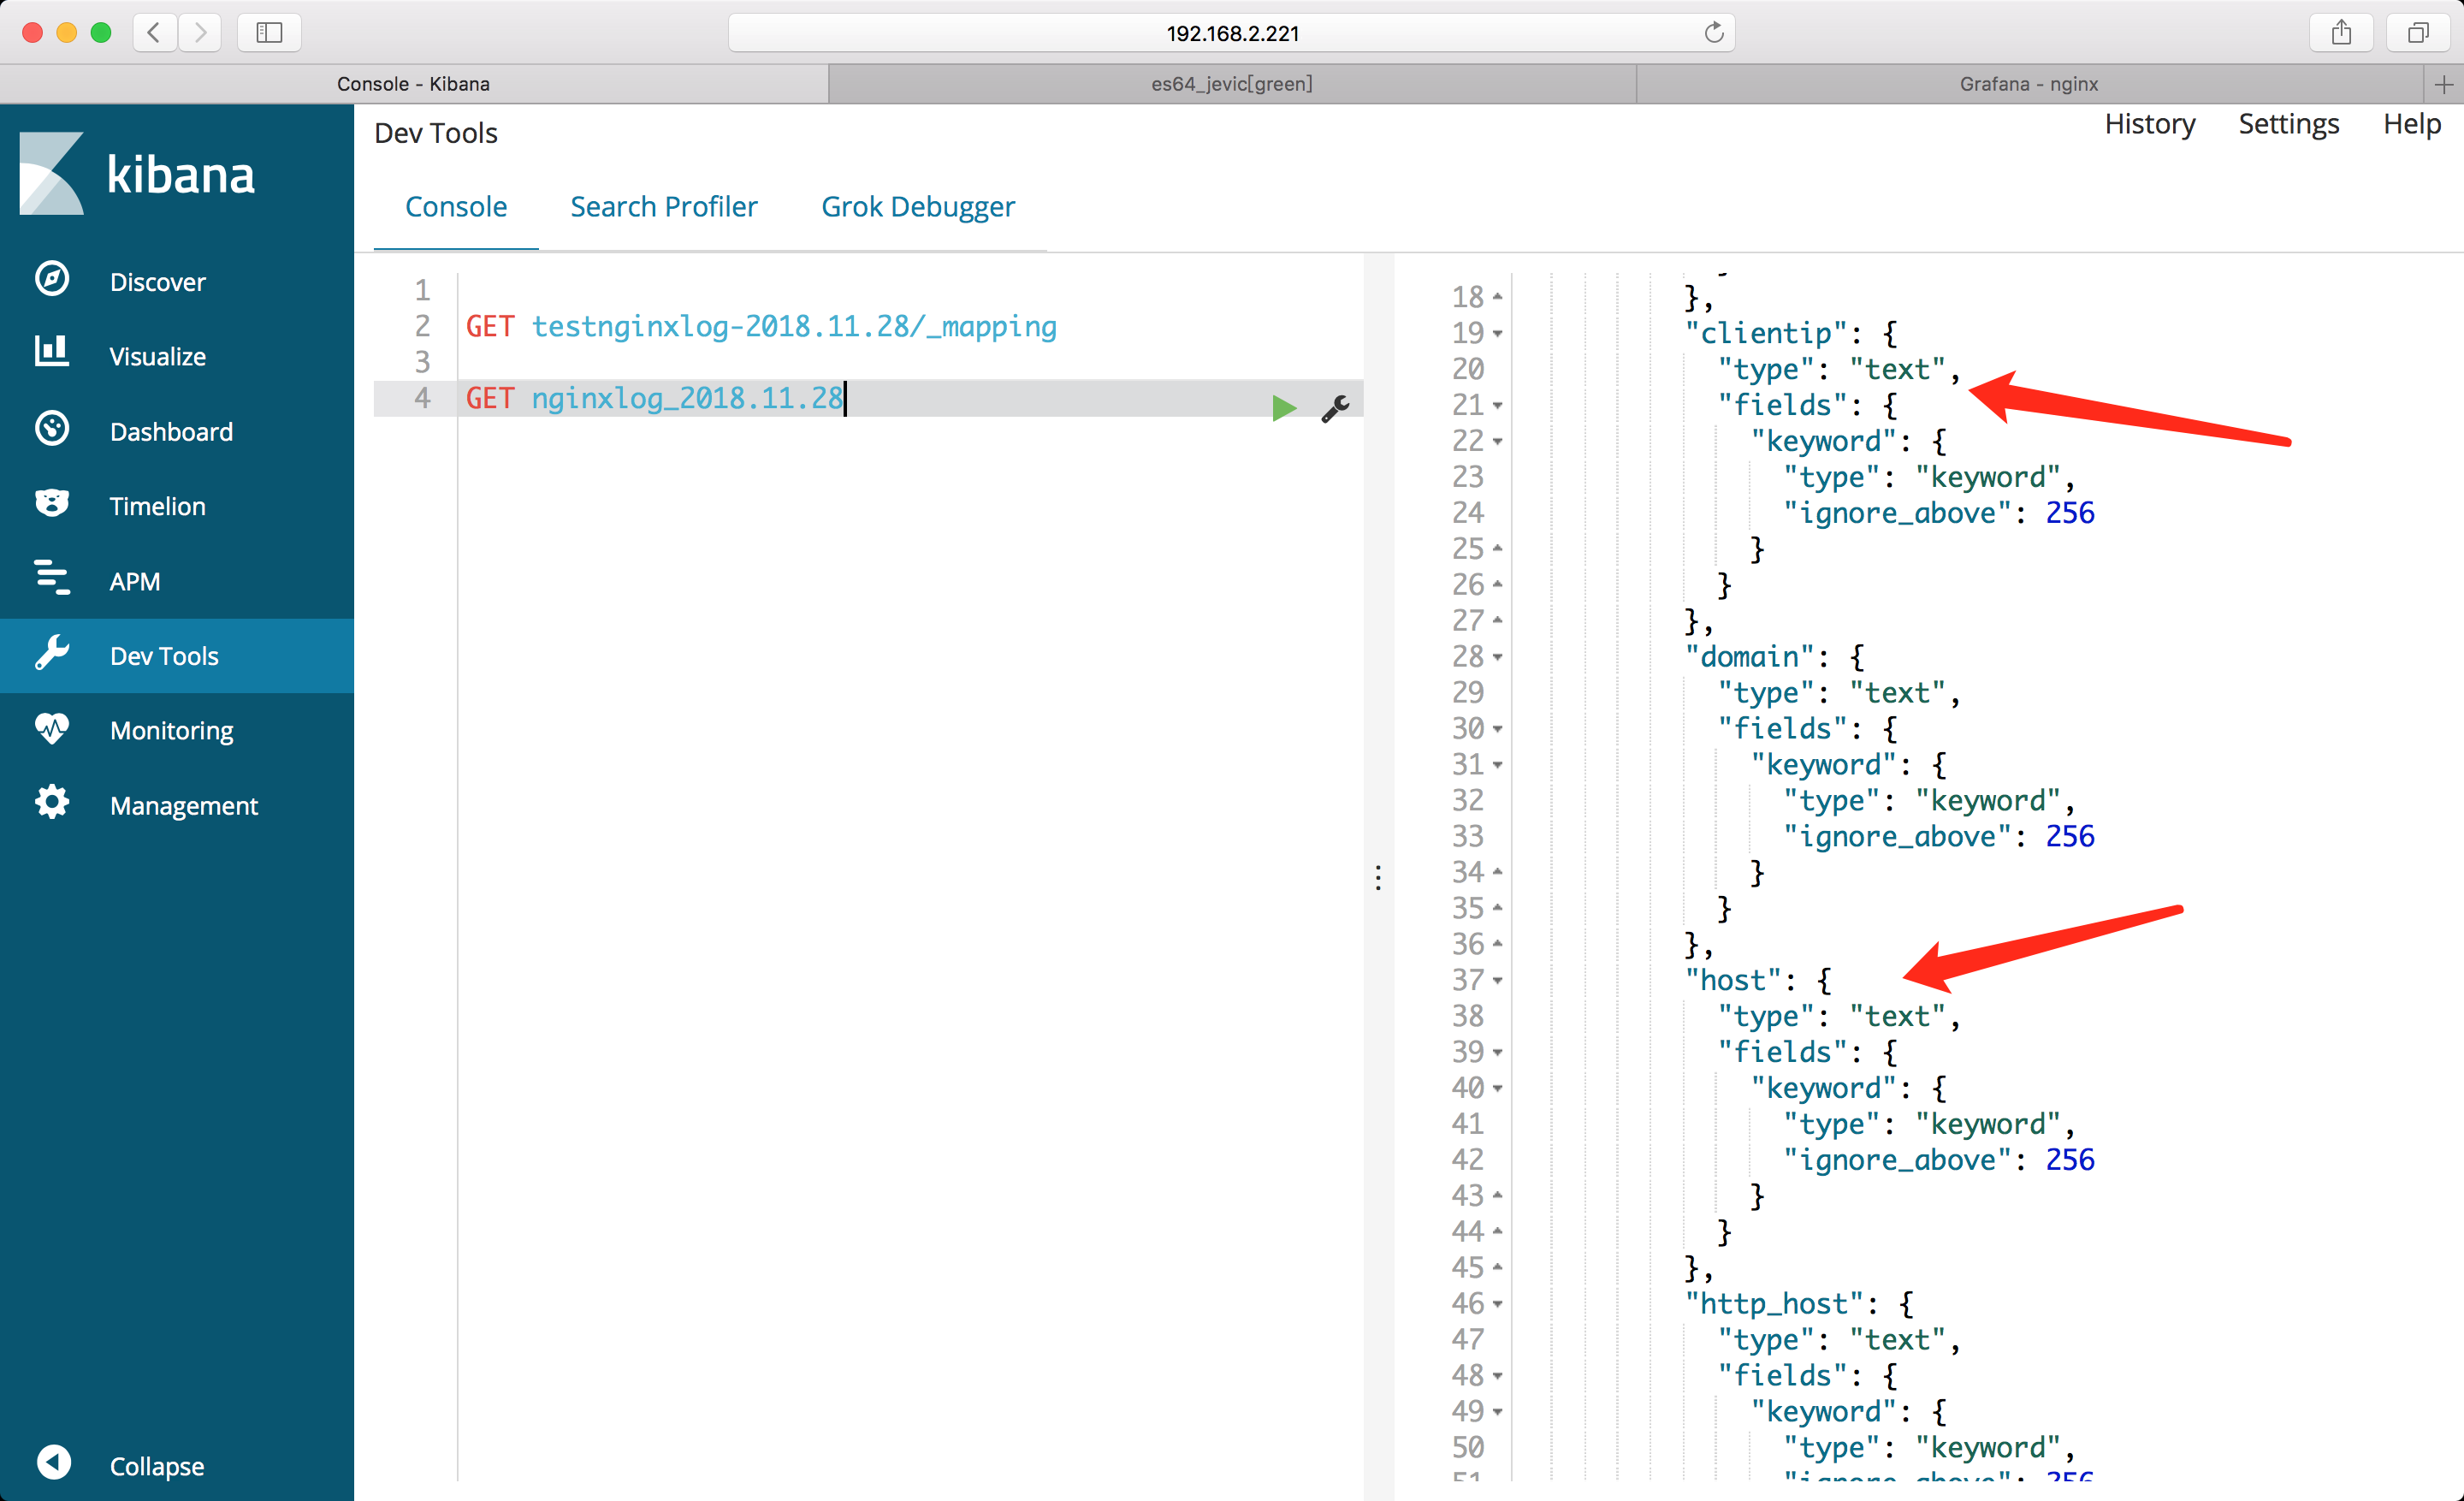
查看索引mapping
在 elasticsearch 2.x 版本,字符串数据只有string类型 更新到5.x版本后,取消了string 数据类型,代替它的是 keyword 和 text 数据类型
- Mapping 类似数据库中的表结构定义,主要作用如下:
- 定义index 下的字段名(Field Name)
- 定义字段的类型,比如: 数值型、字符串型、布尔型等
- 定义倒排索引相关配置,比如是否索引、记录position等
默认: “key”:”value” 格式的都默认为text类型 而对于”key”: value 格式的会根据数值类型进行格式匹配
例如:
{
....
"responsetime": 0.001,
"upstreamtime": "0.001",
...
}
- responsetime: 匹配为fload 类型
-
upstreamtime: 匹配为text类型,此时如果想要做聚合查询以及计算数值需要配置mapping 指定字段类型
-
- text类型:会分词,先把对象进行分词处理,然后再再存入到es中。
当使用多个单词进行查询的时候,当然查不到已经分词过的内容!
-
- keyword:不分词,没有把es中的对象进行分词处理,而是存入了整个对象!
这时候当然可以进行完整地查询!默认是256个字符!
- “ignore_above”: 256 详情查看官网文档
nginxlog_*
testnginxlog-*

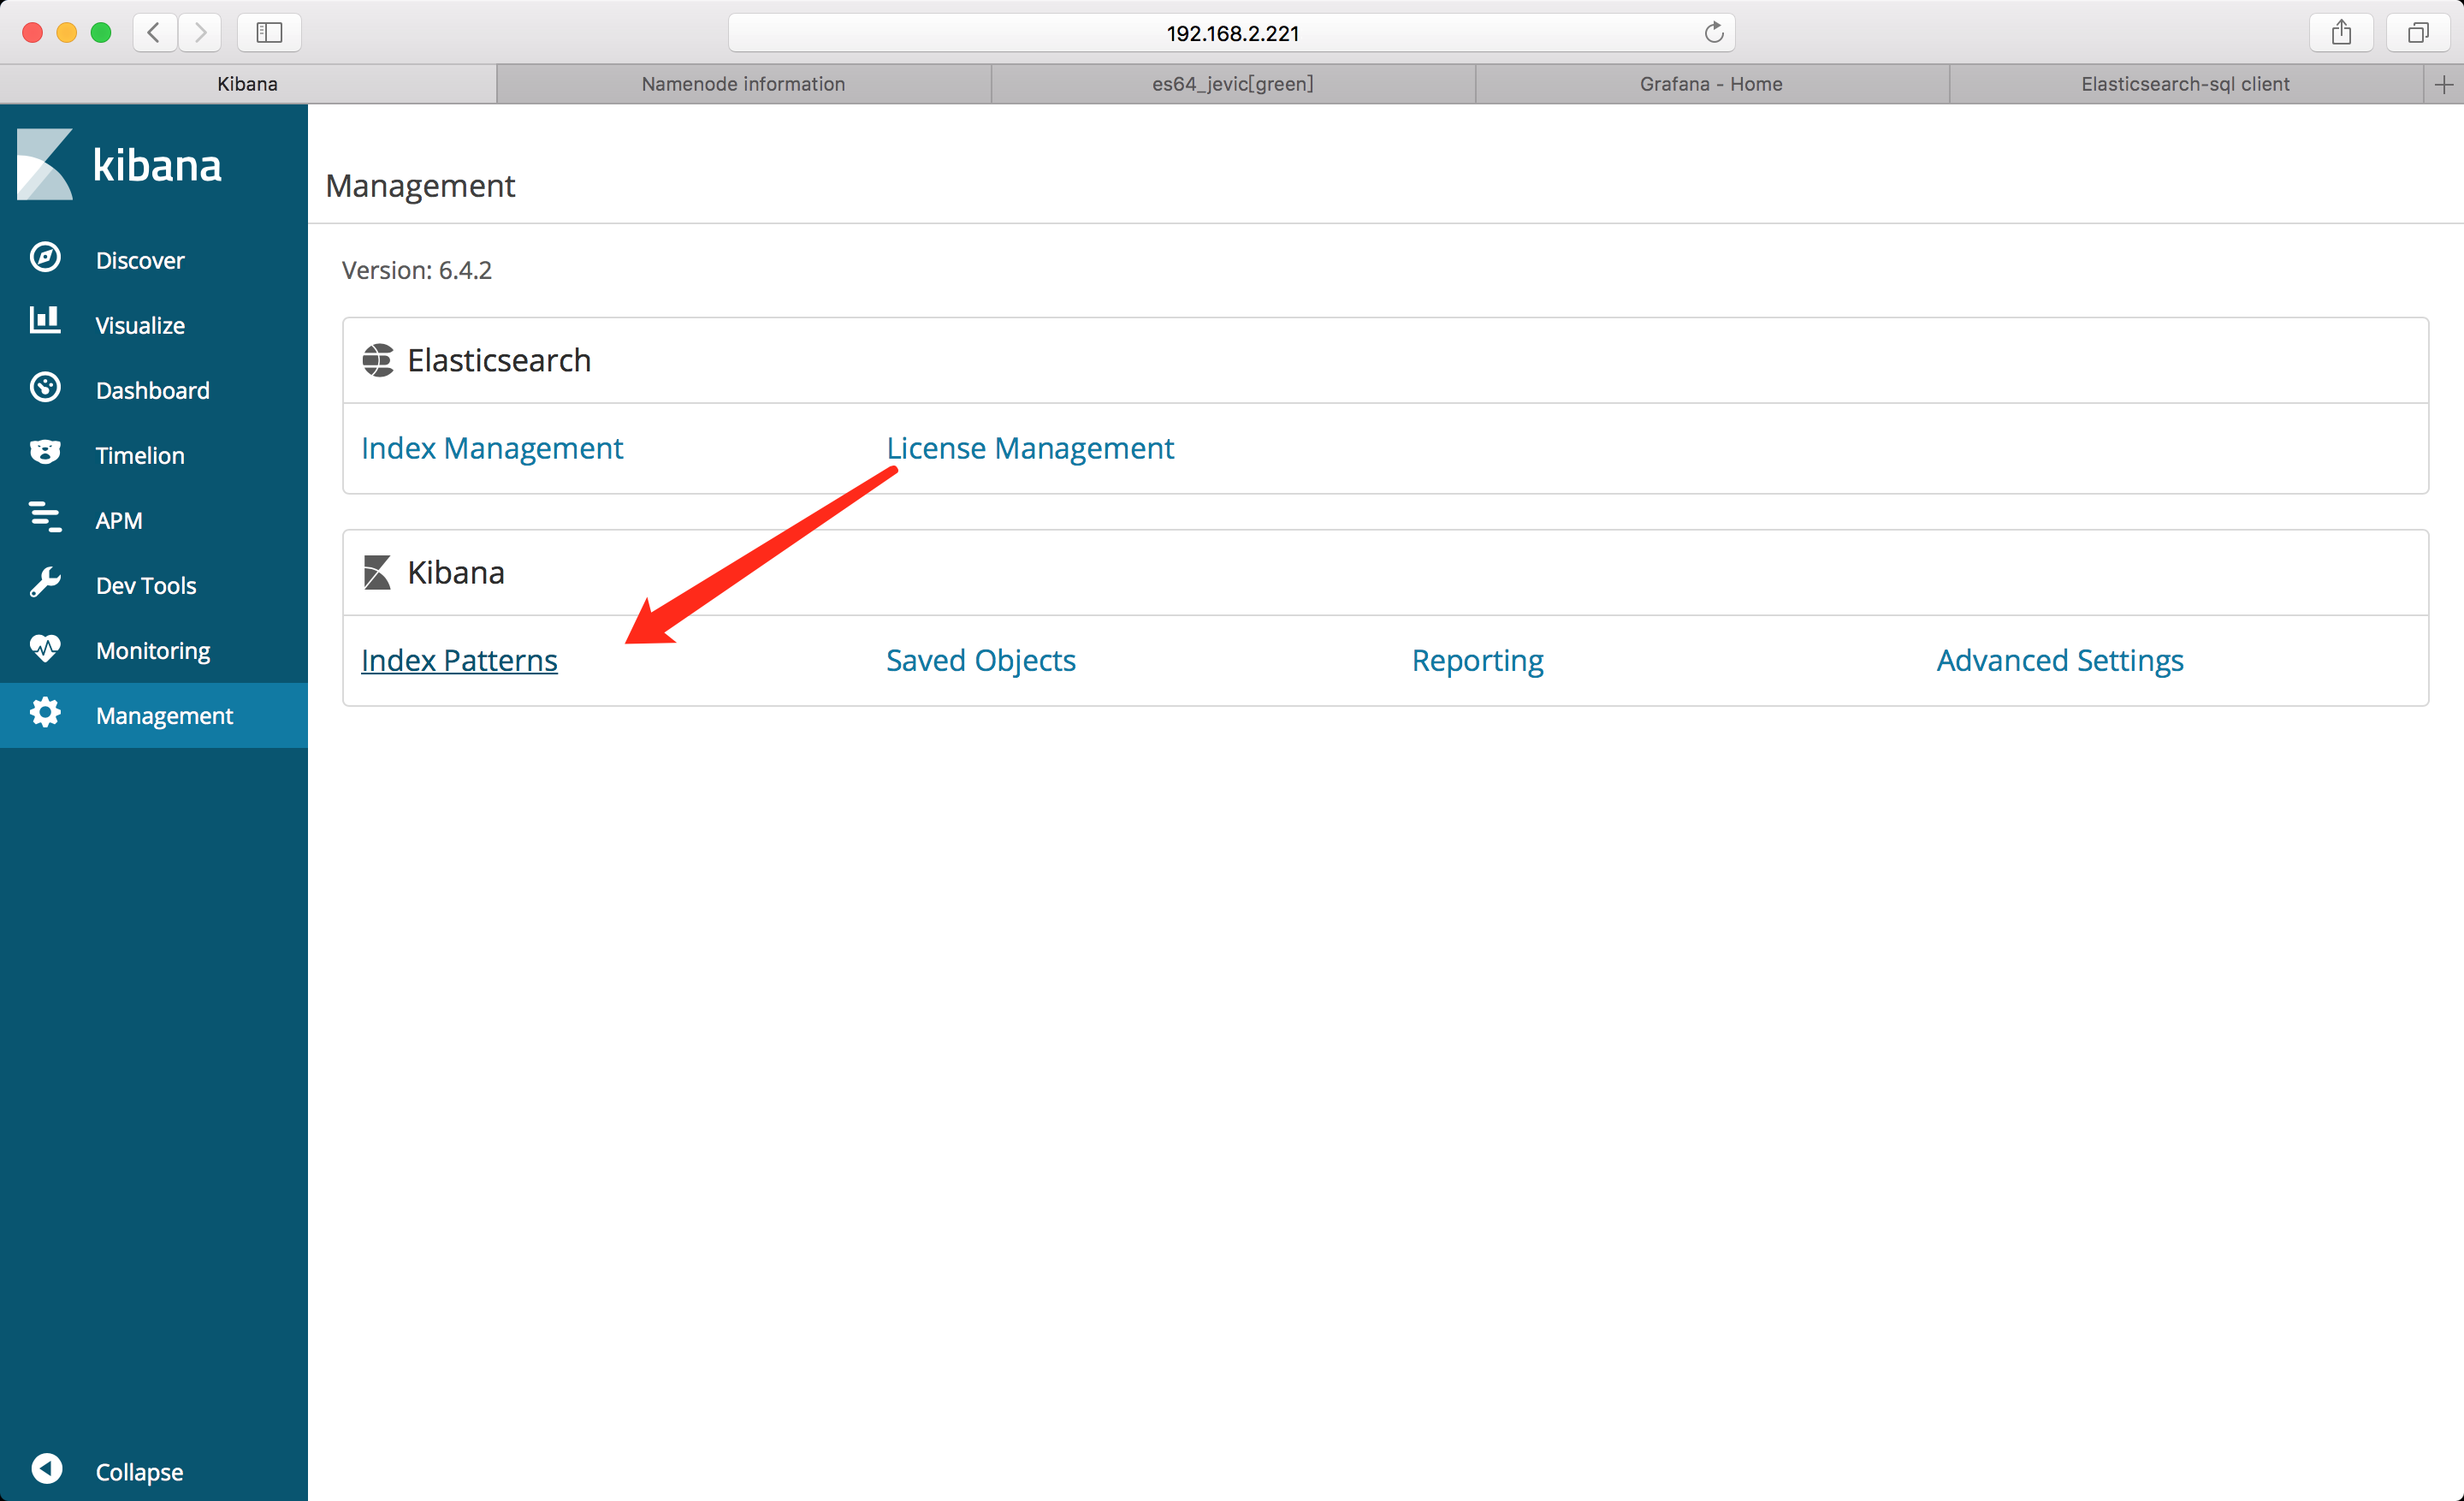
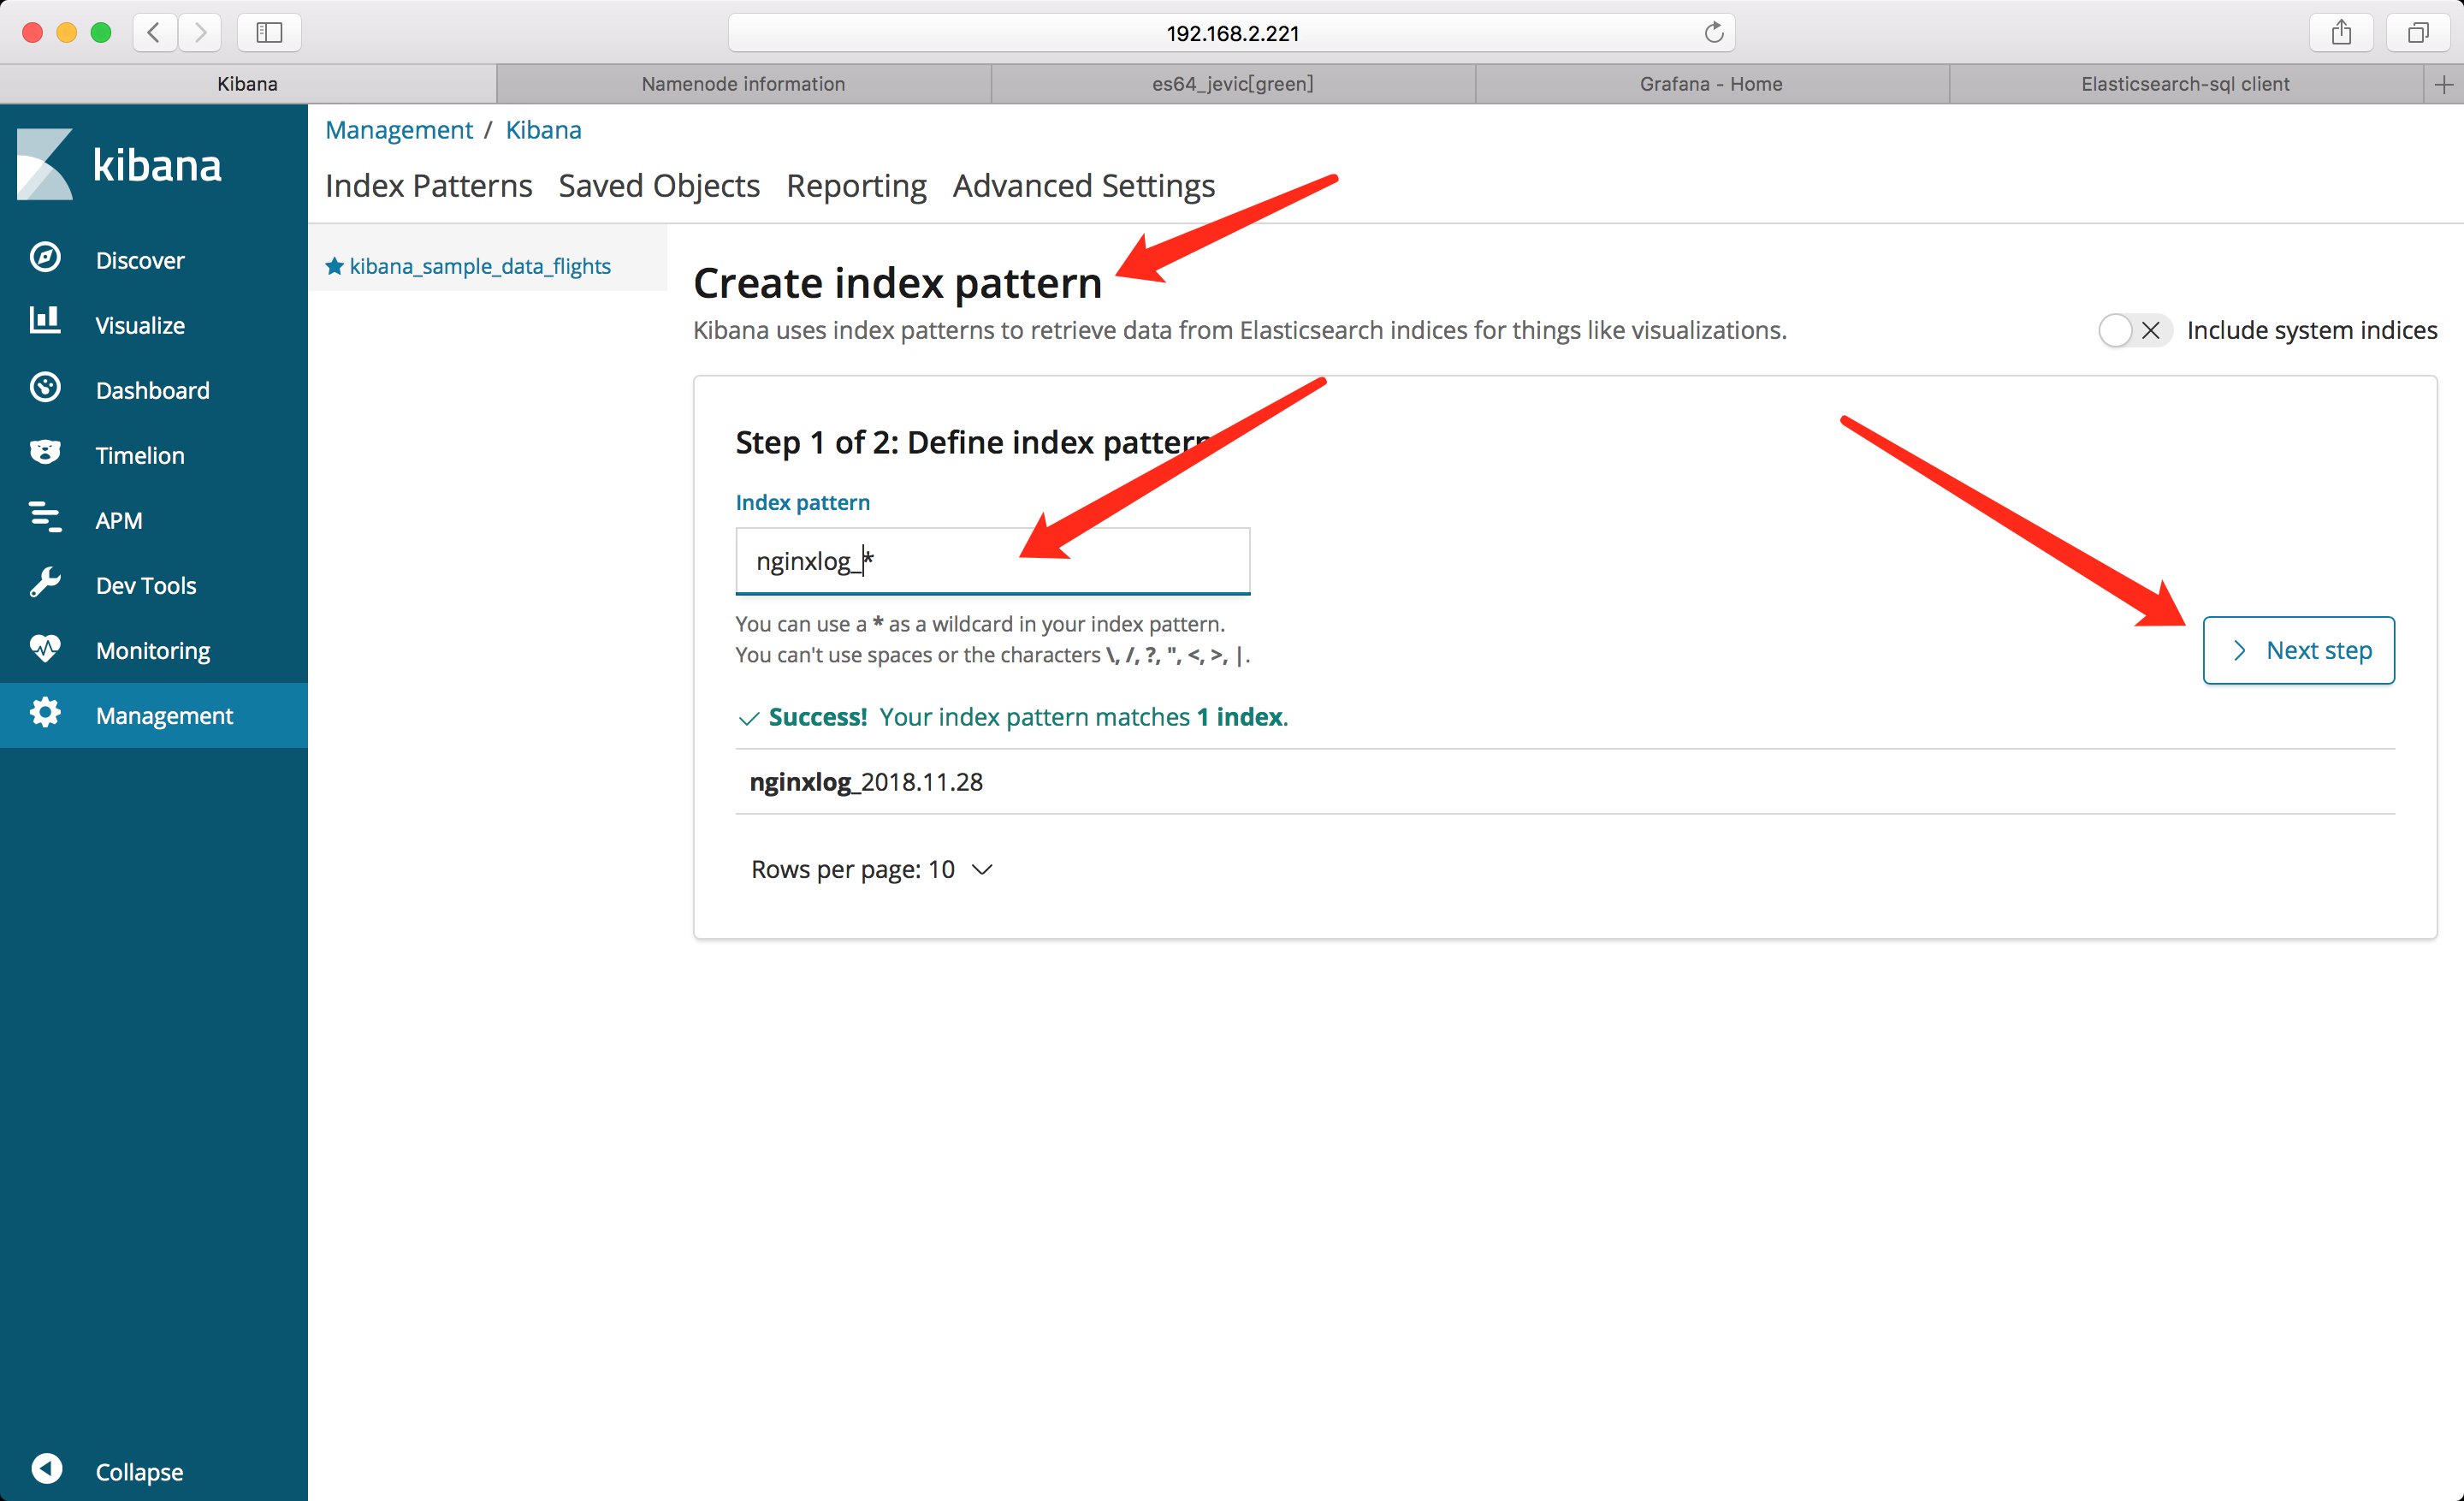
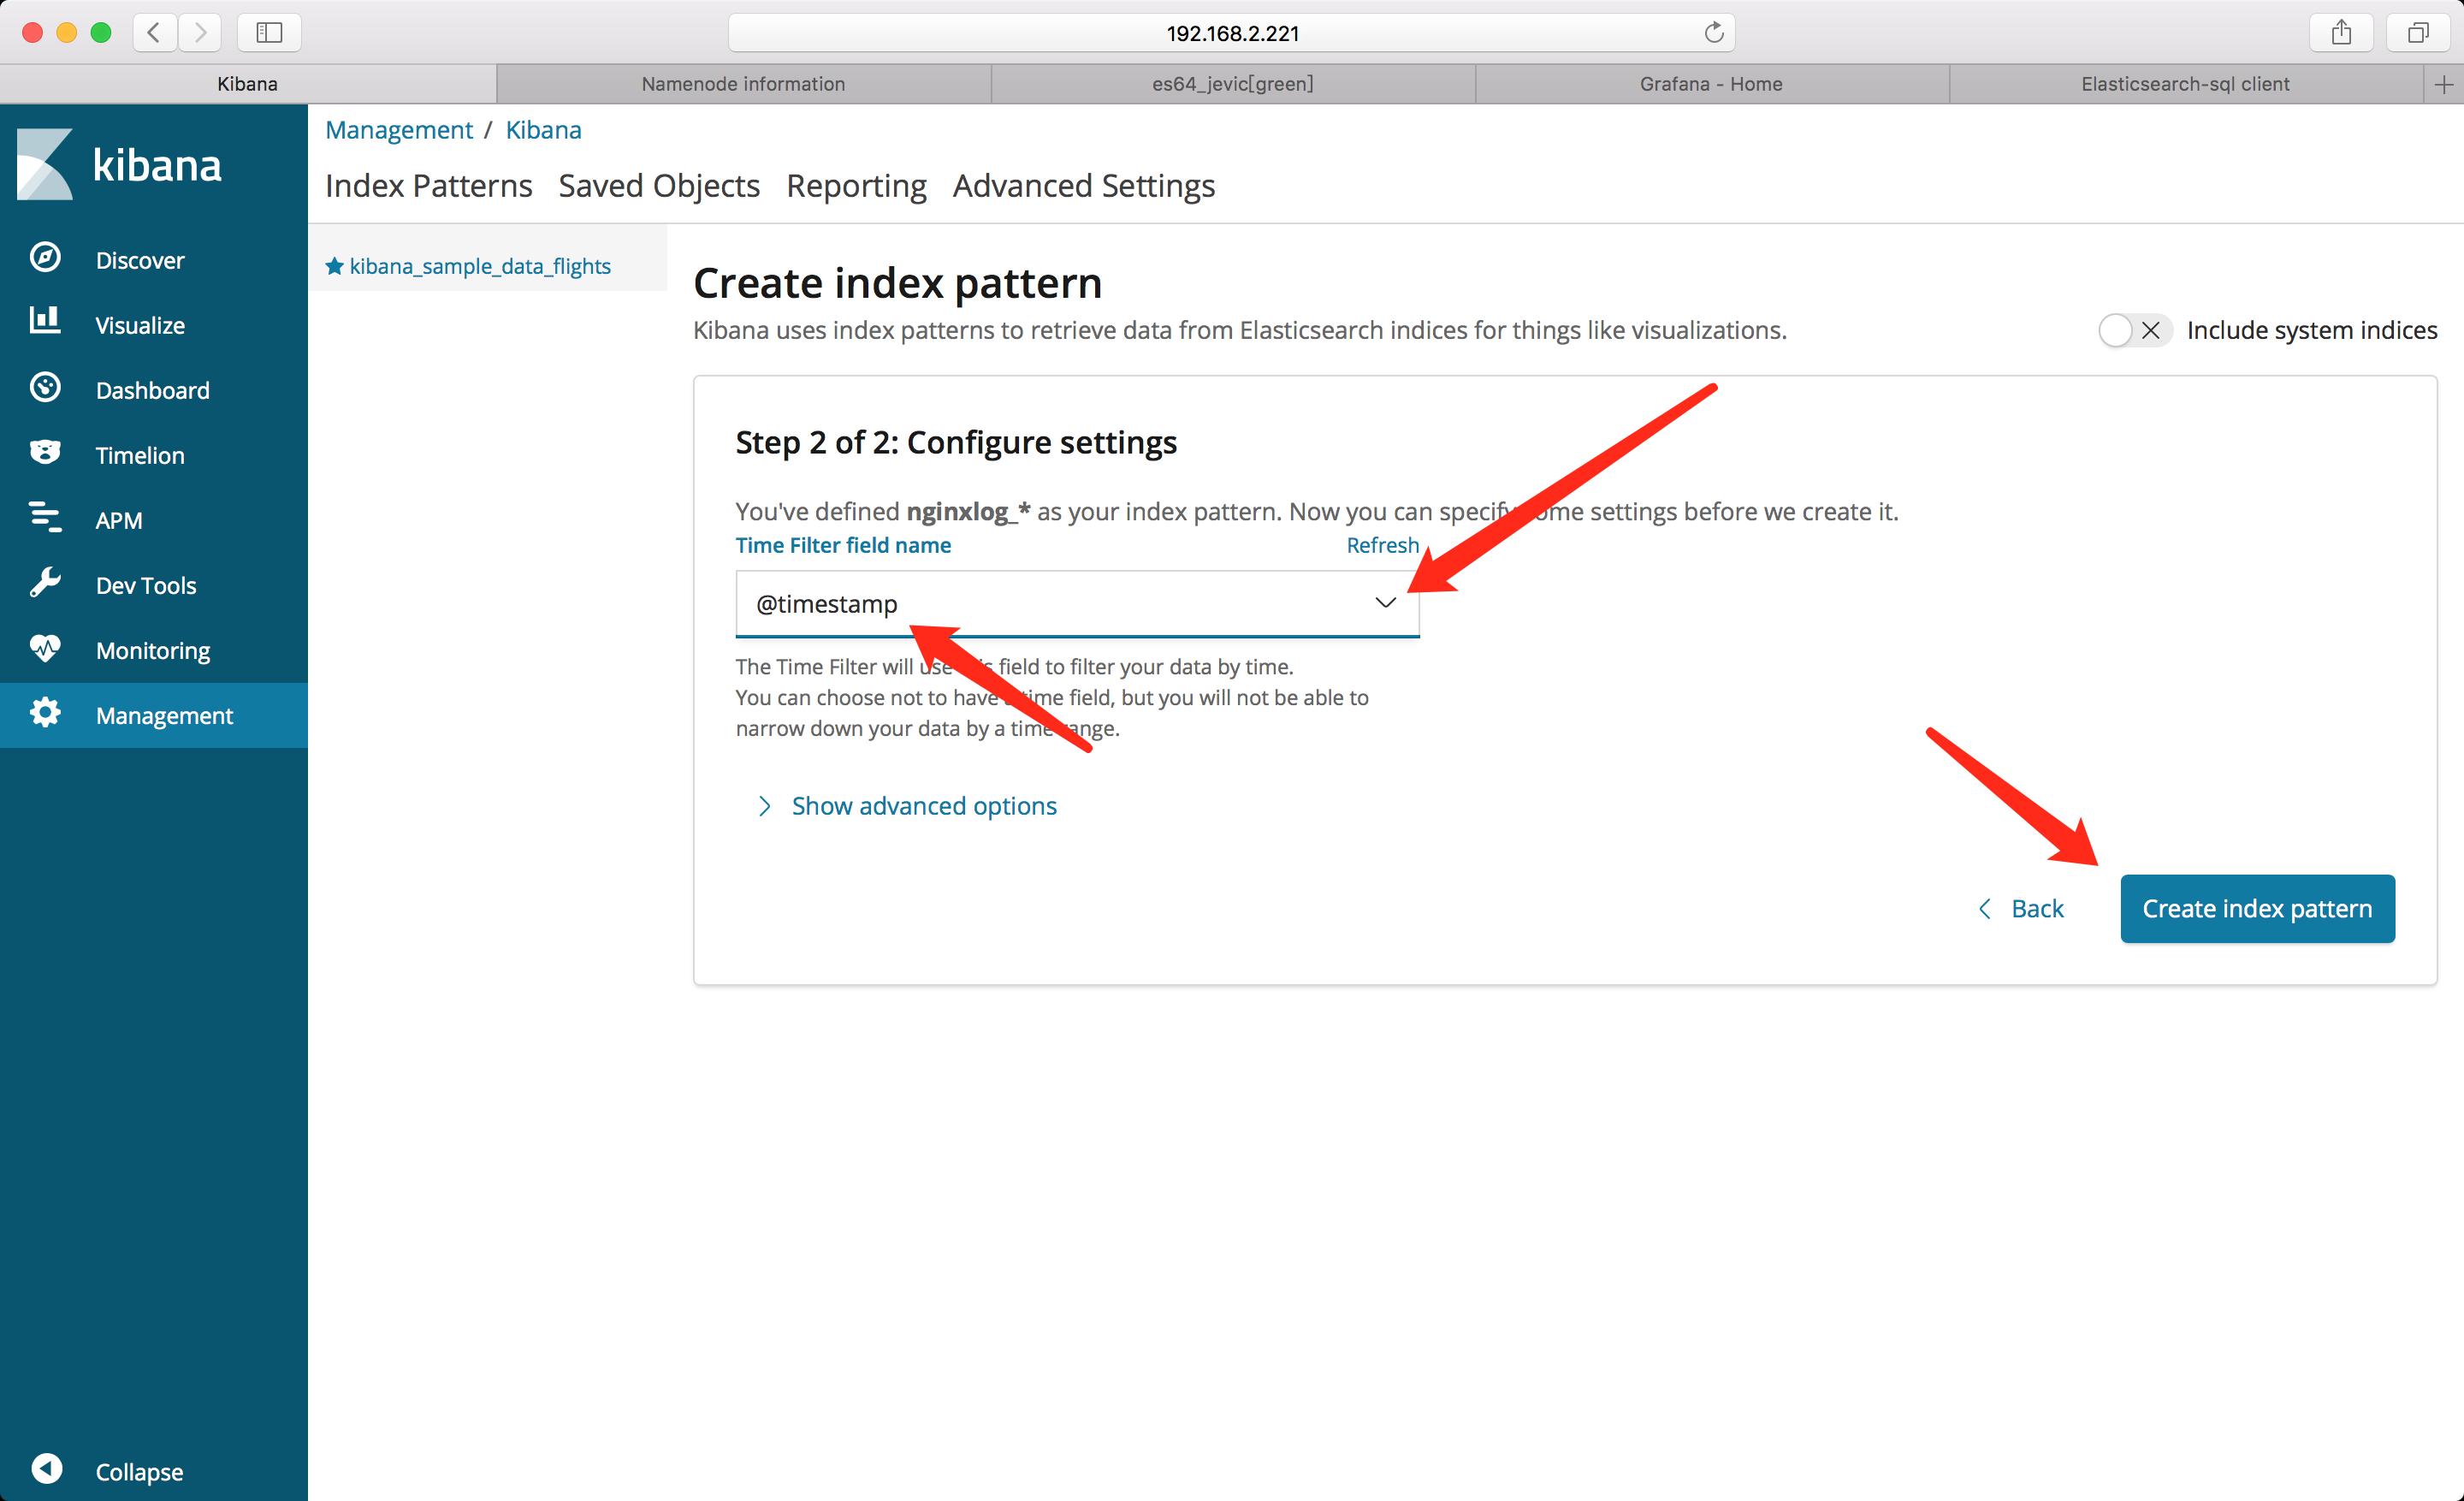
kibana
添加索引
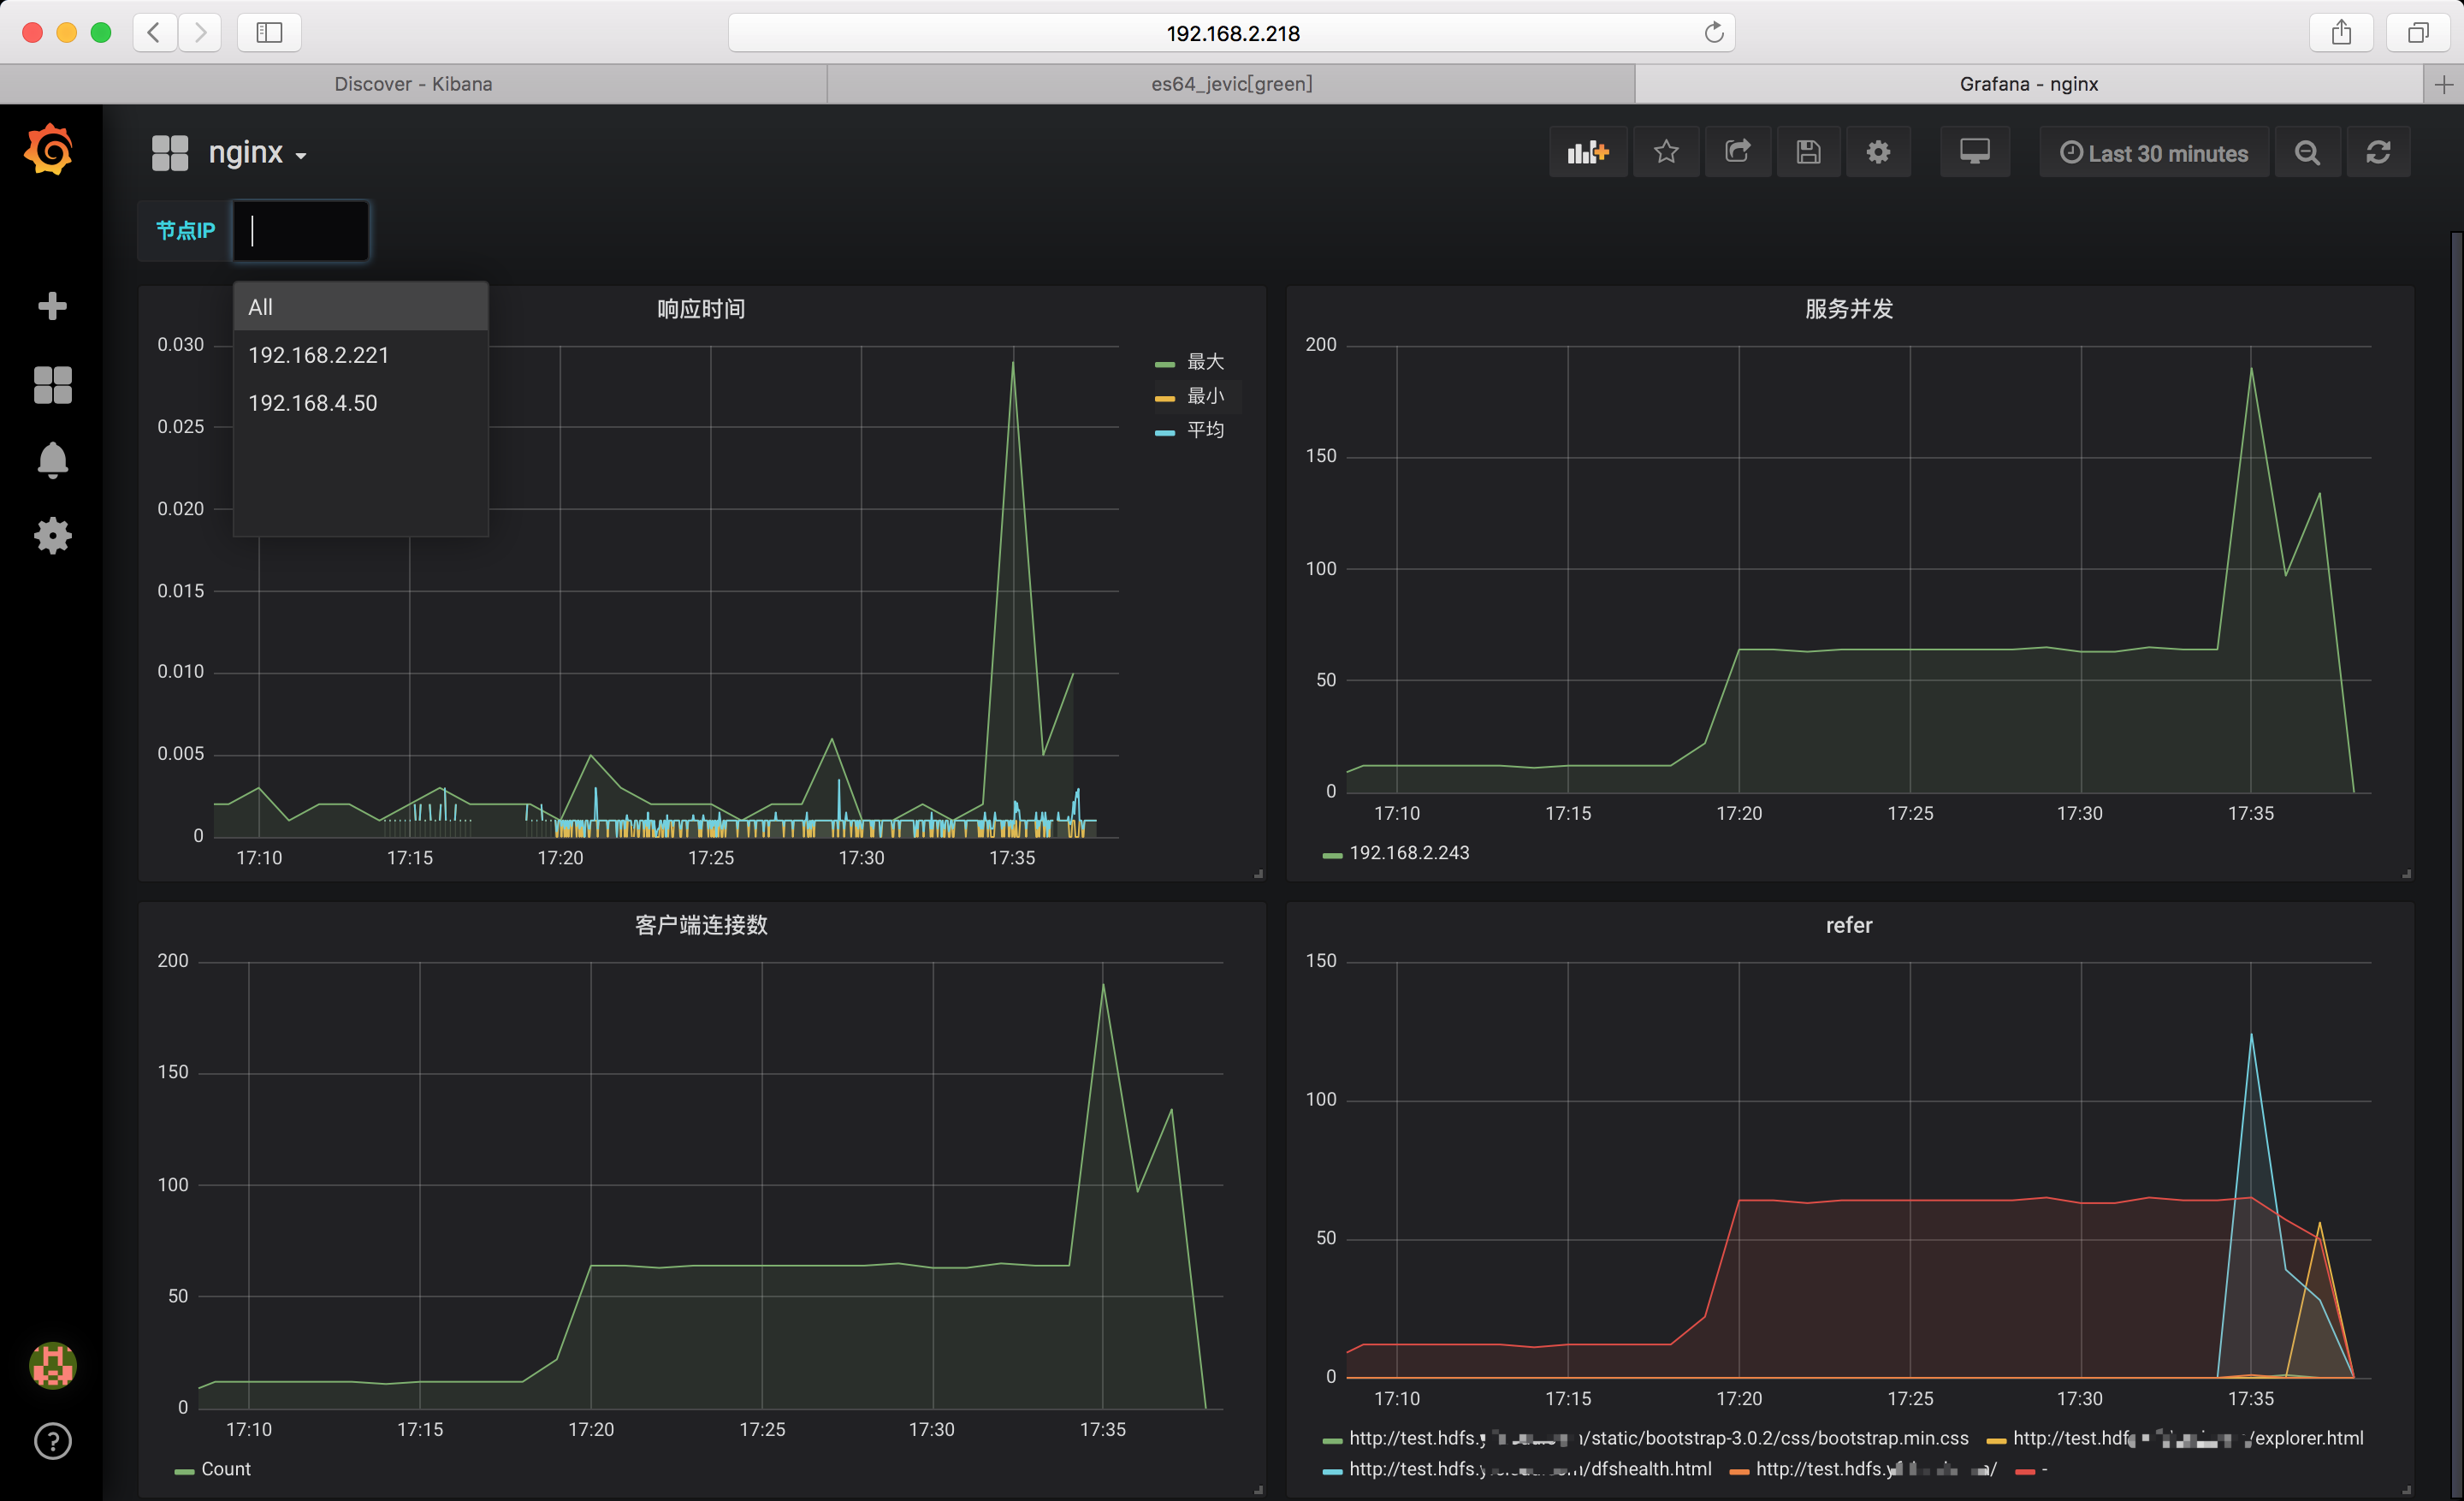
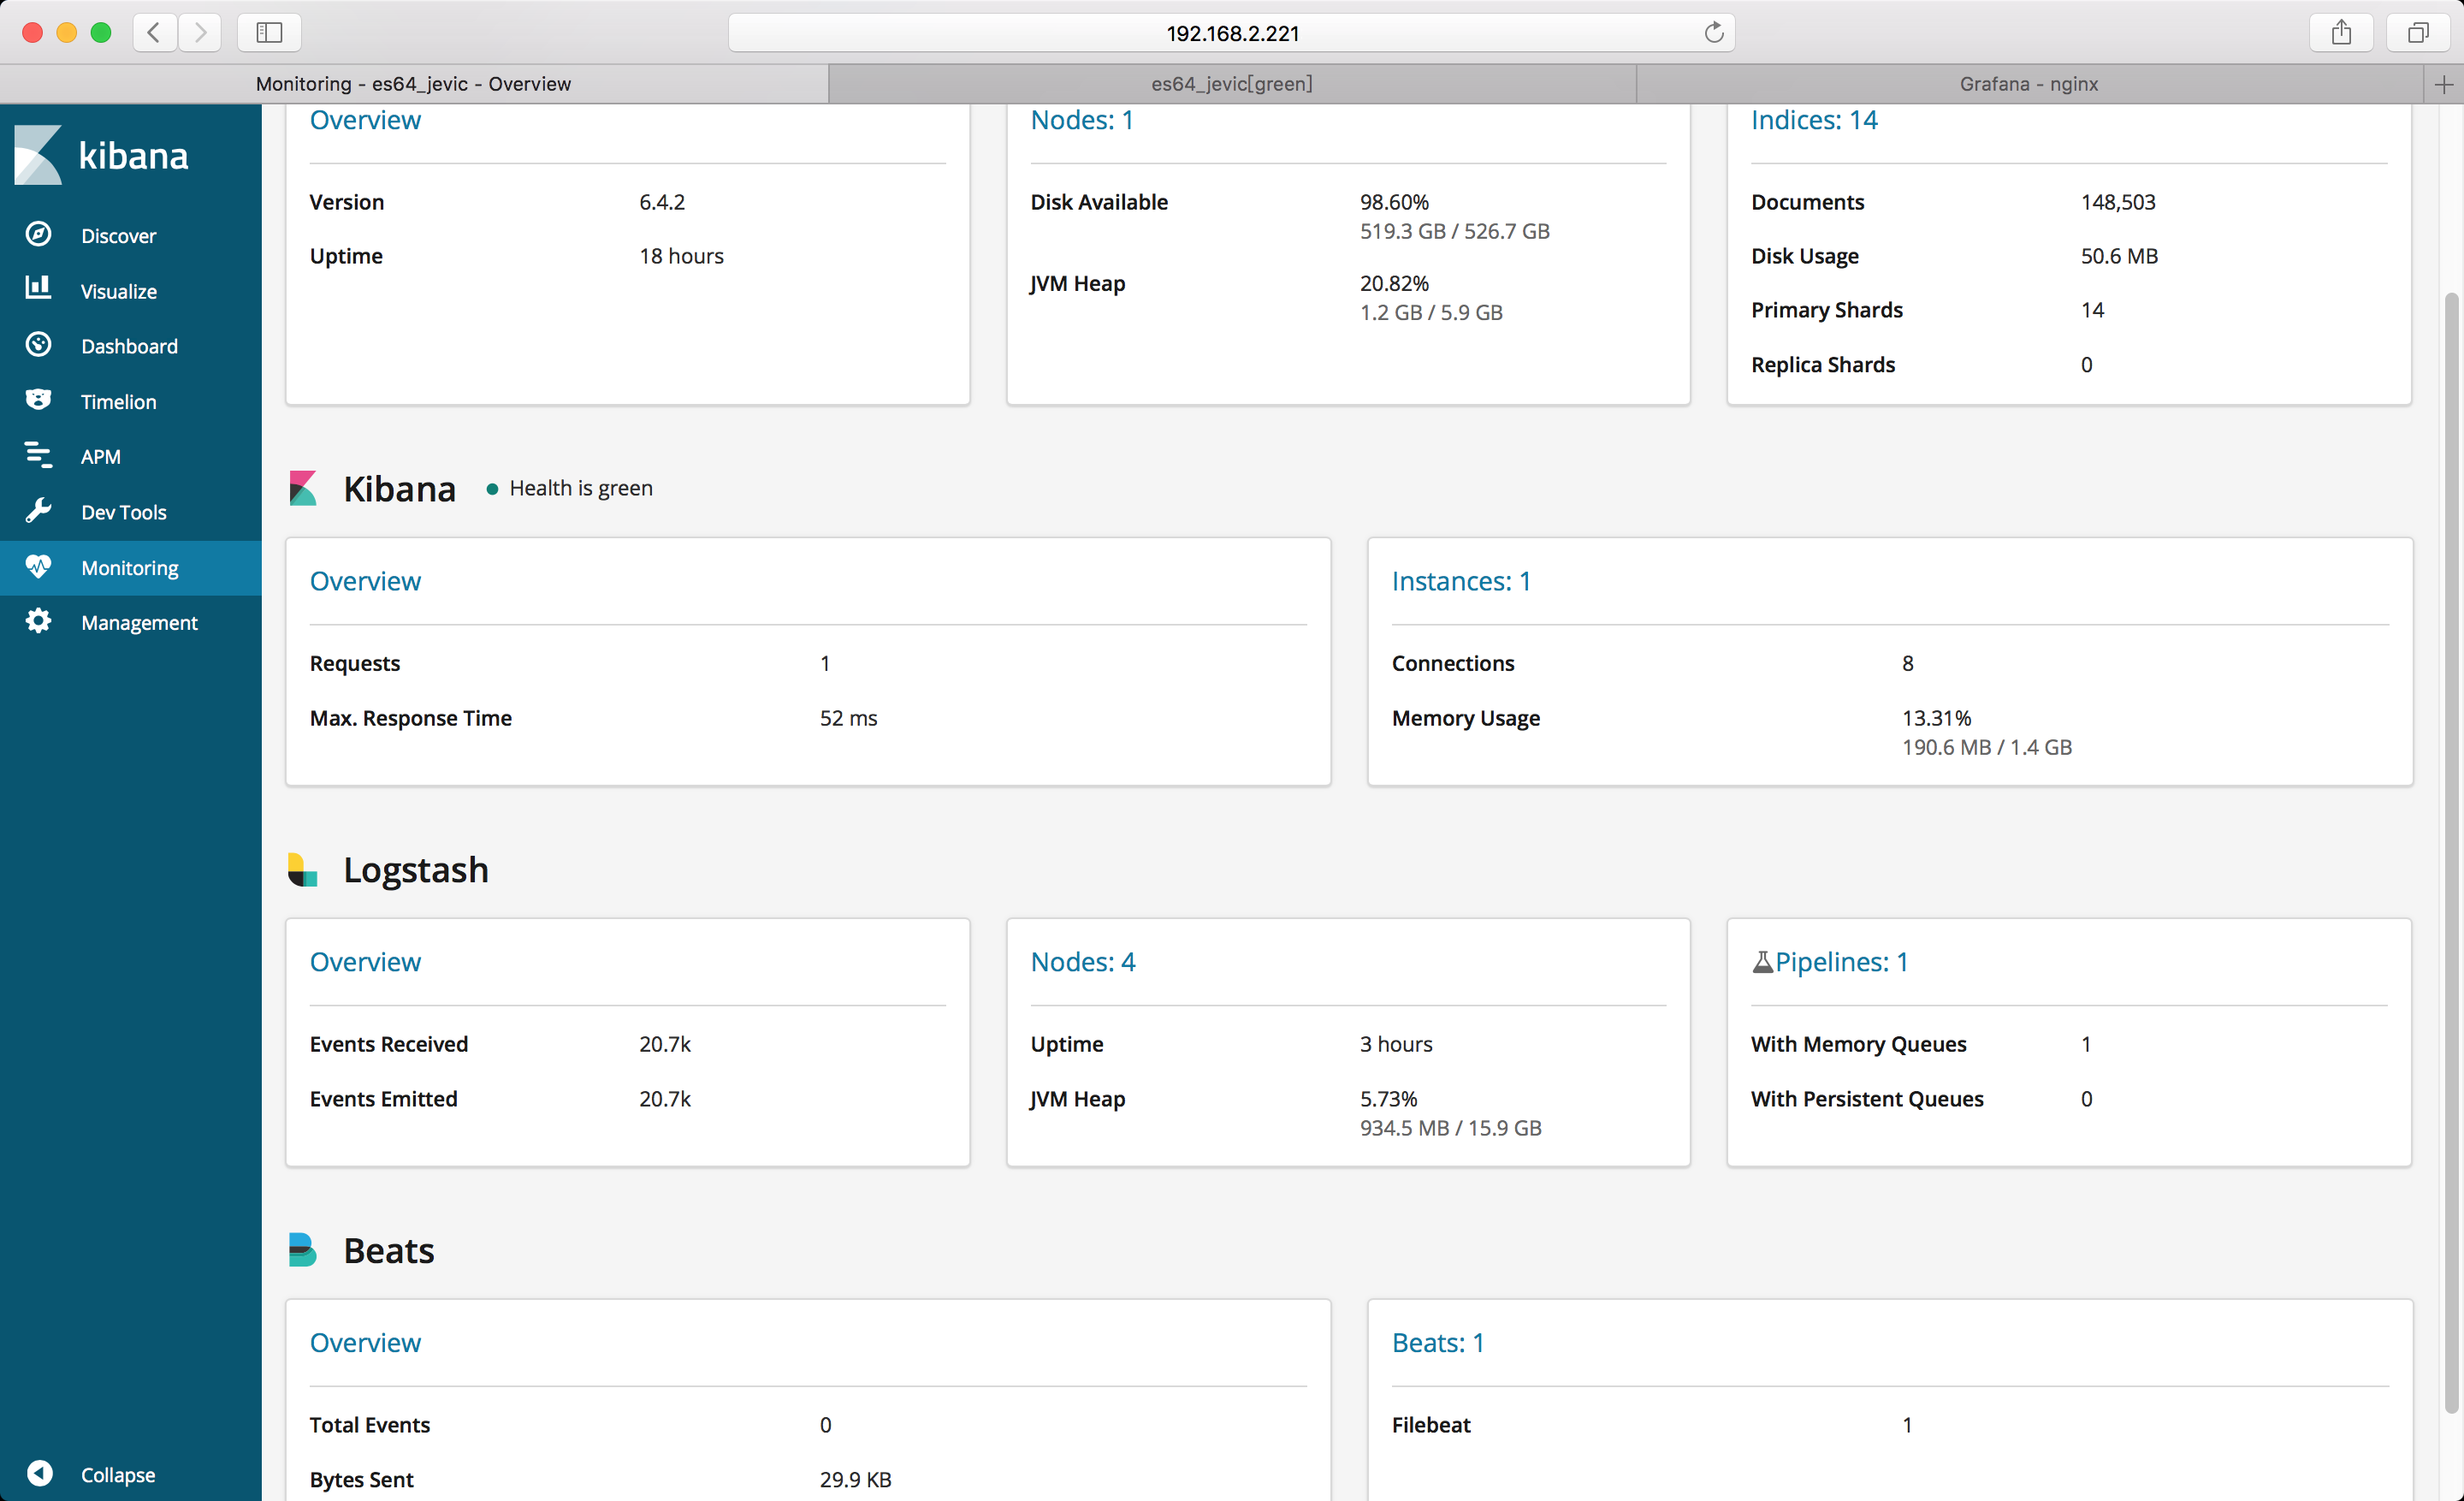
监控图表
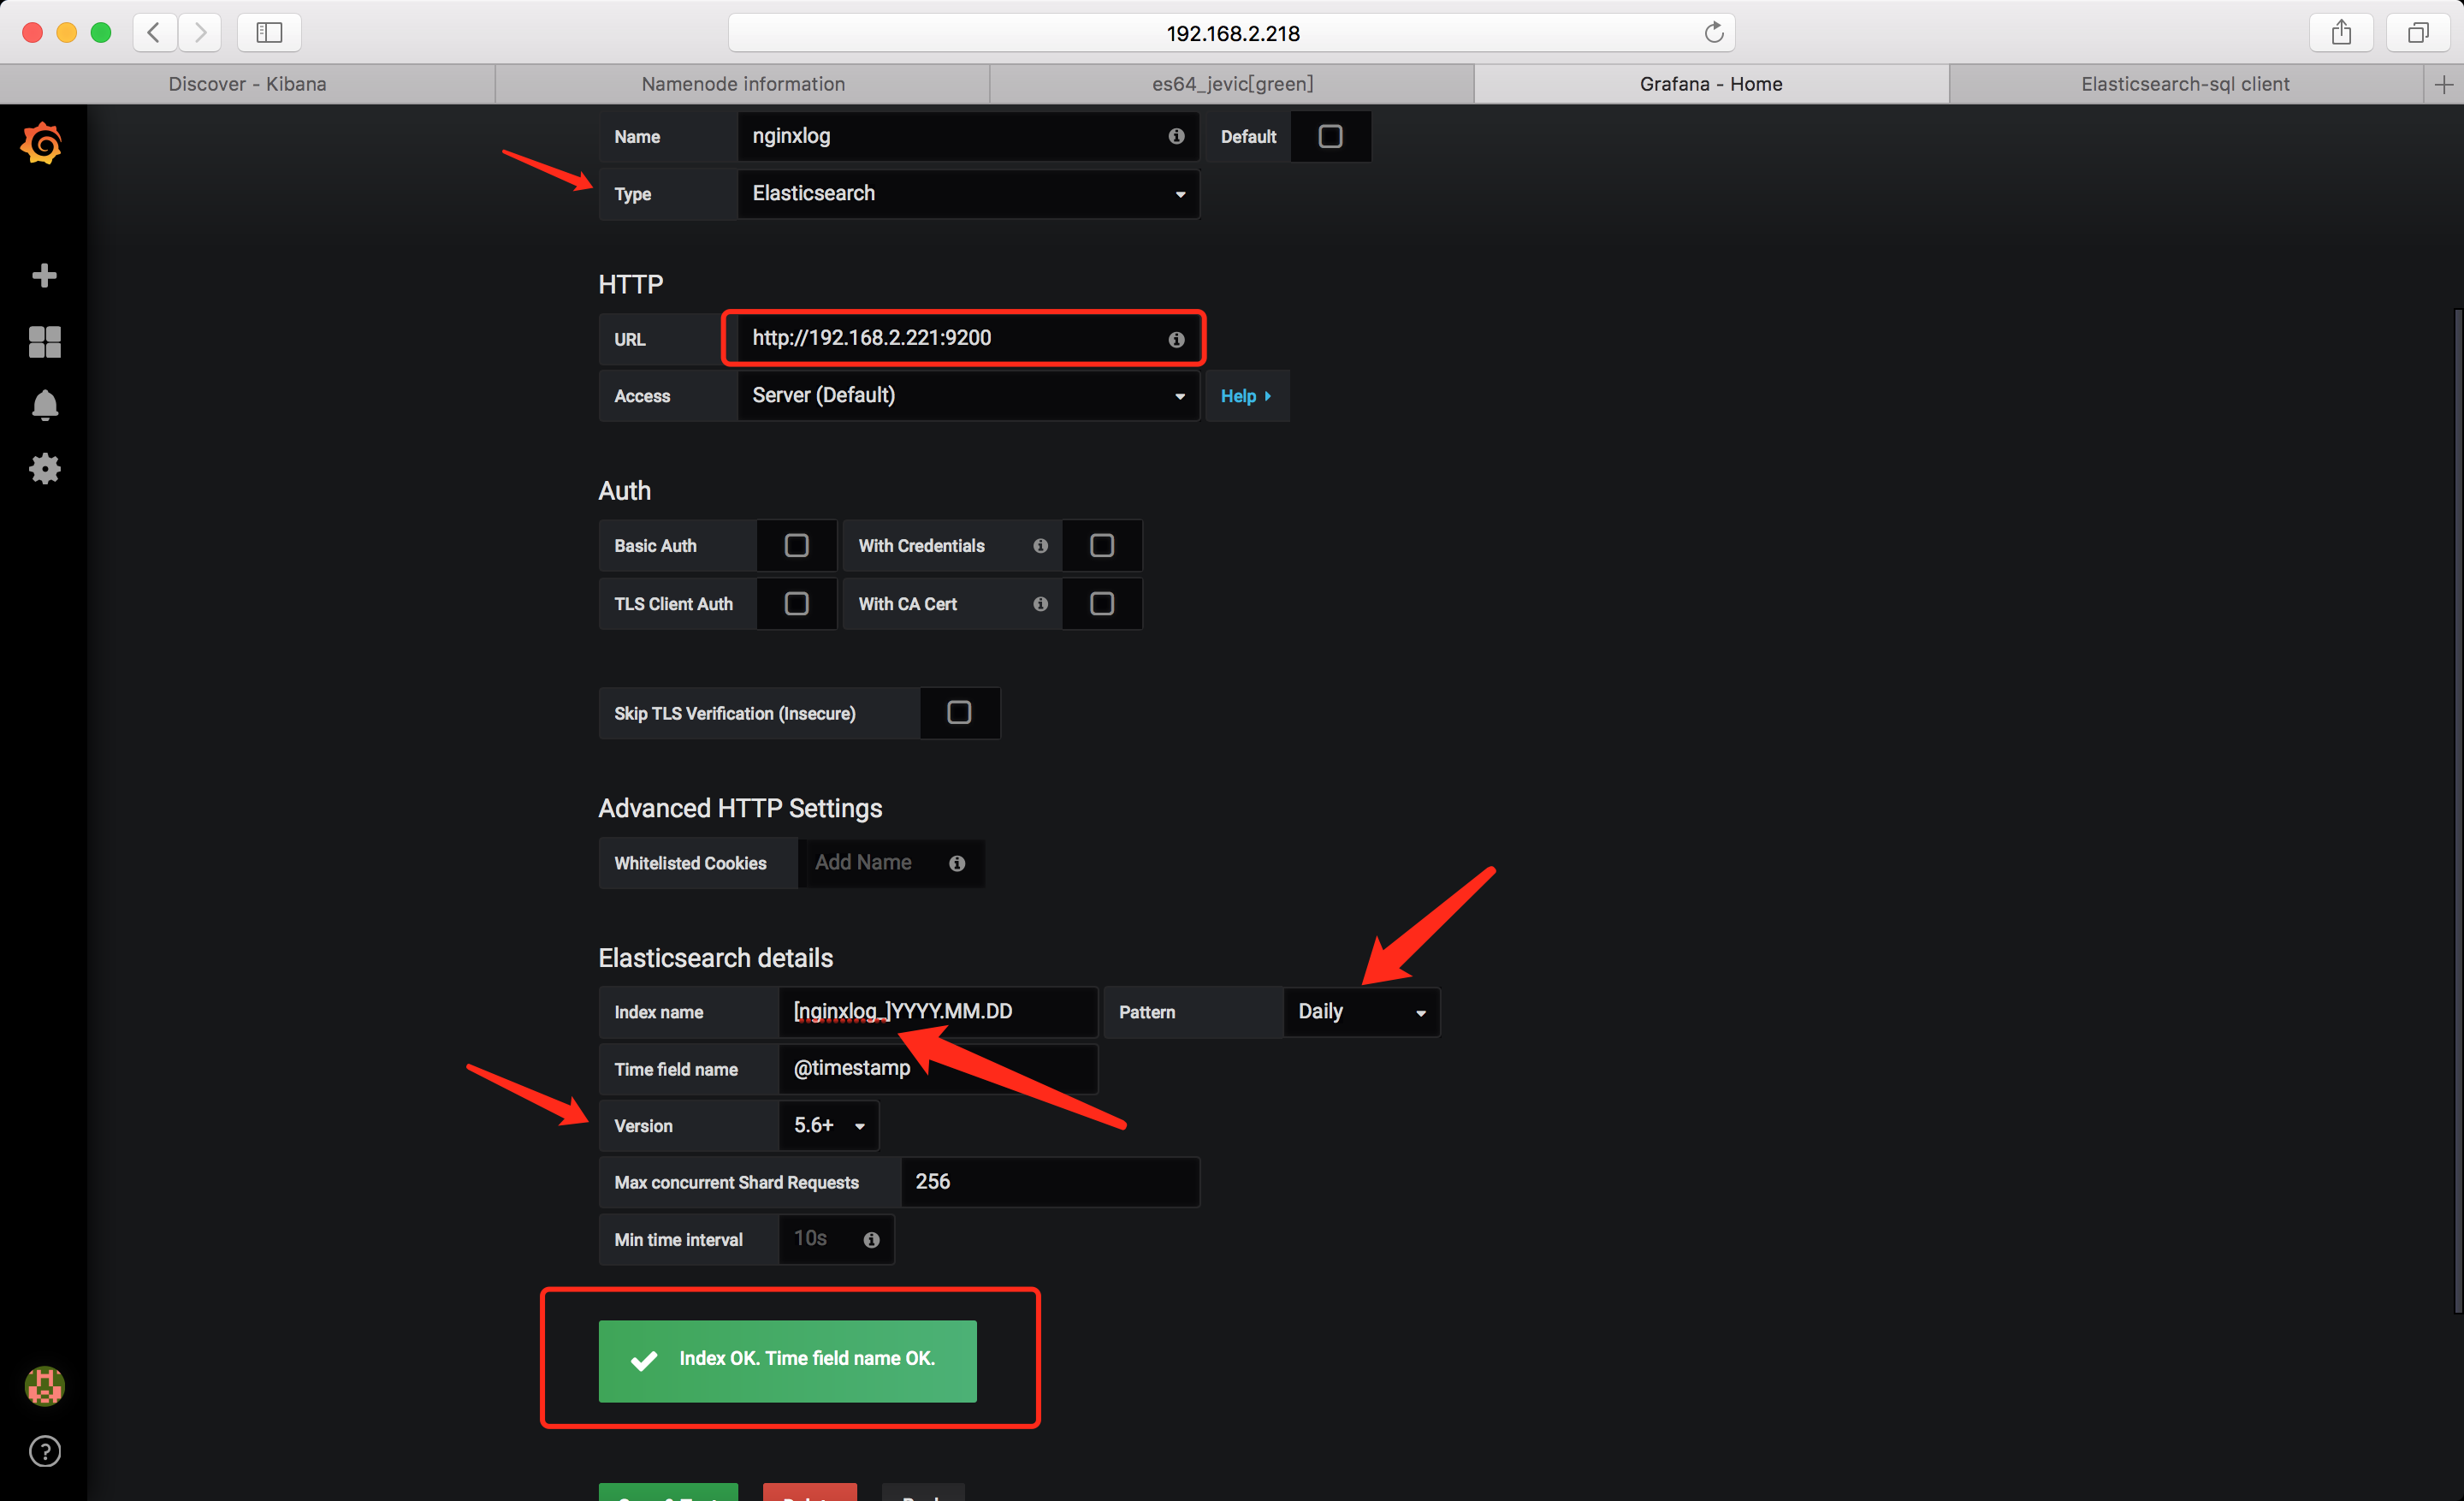
grafana
runing of docker
默认用户名密码: admin:admin
docker run -d \
--name grafana \
-p 3000:3000 \
-v /var/lib/grafana:/var/lib/grafana
-v /etc/grafana:/etc/grafana
-v /etc/localtime:/etc/localtime
grafana/grafana
数据源
这里ES 版本选择5.6+即可
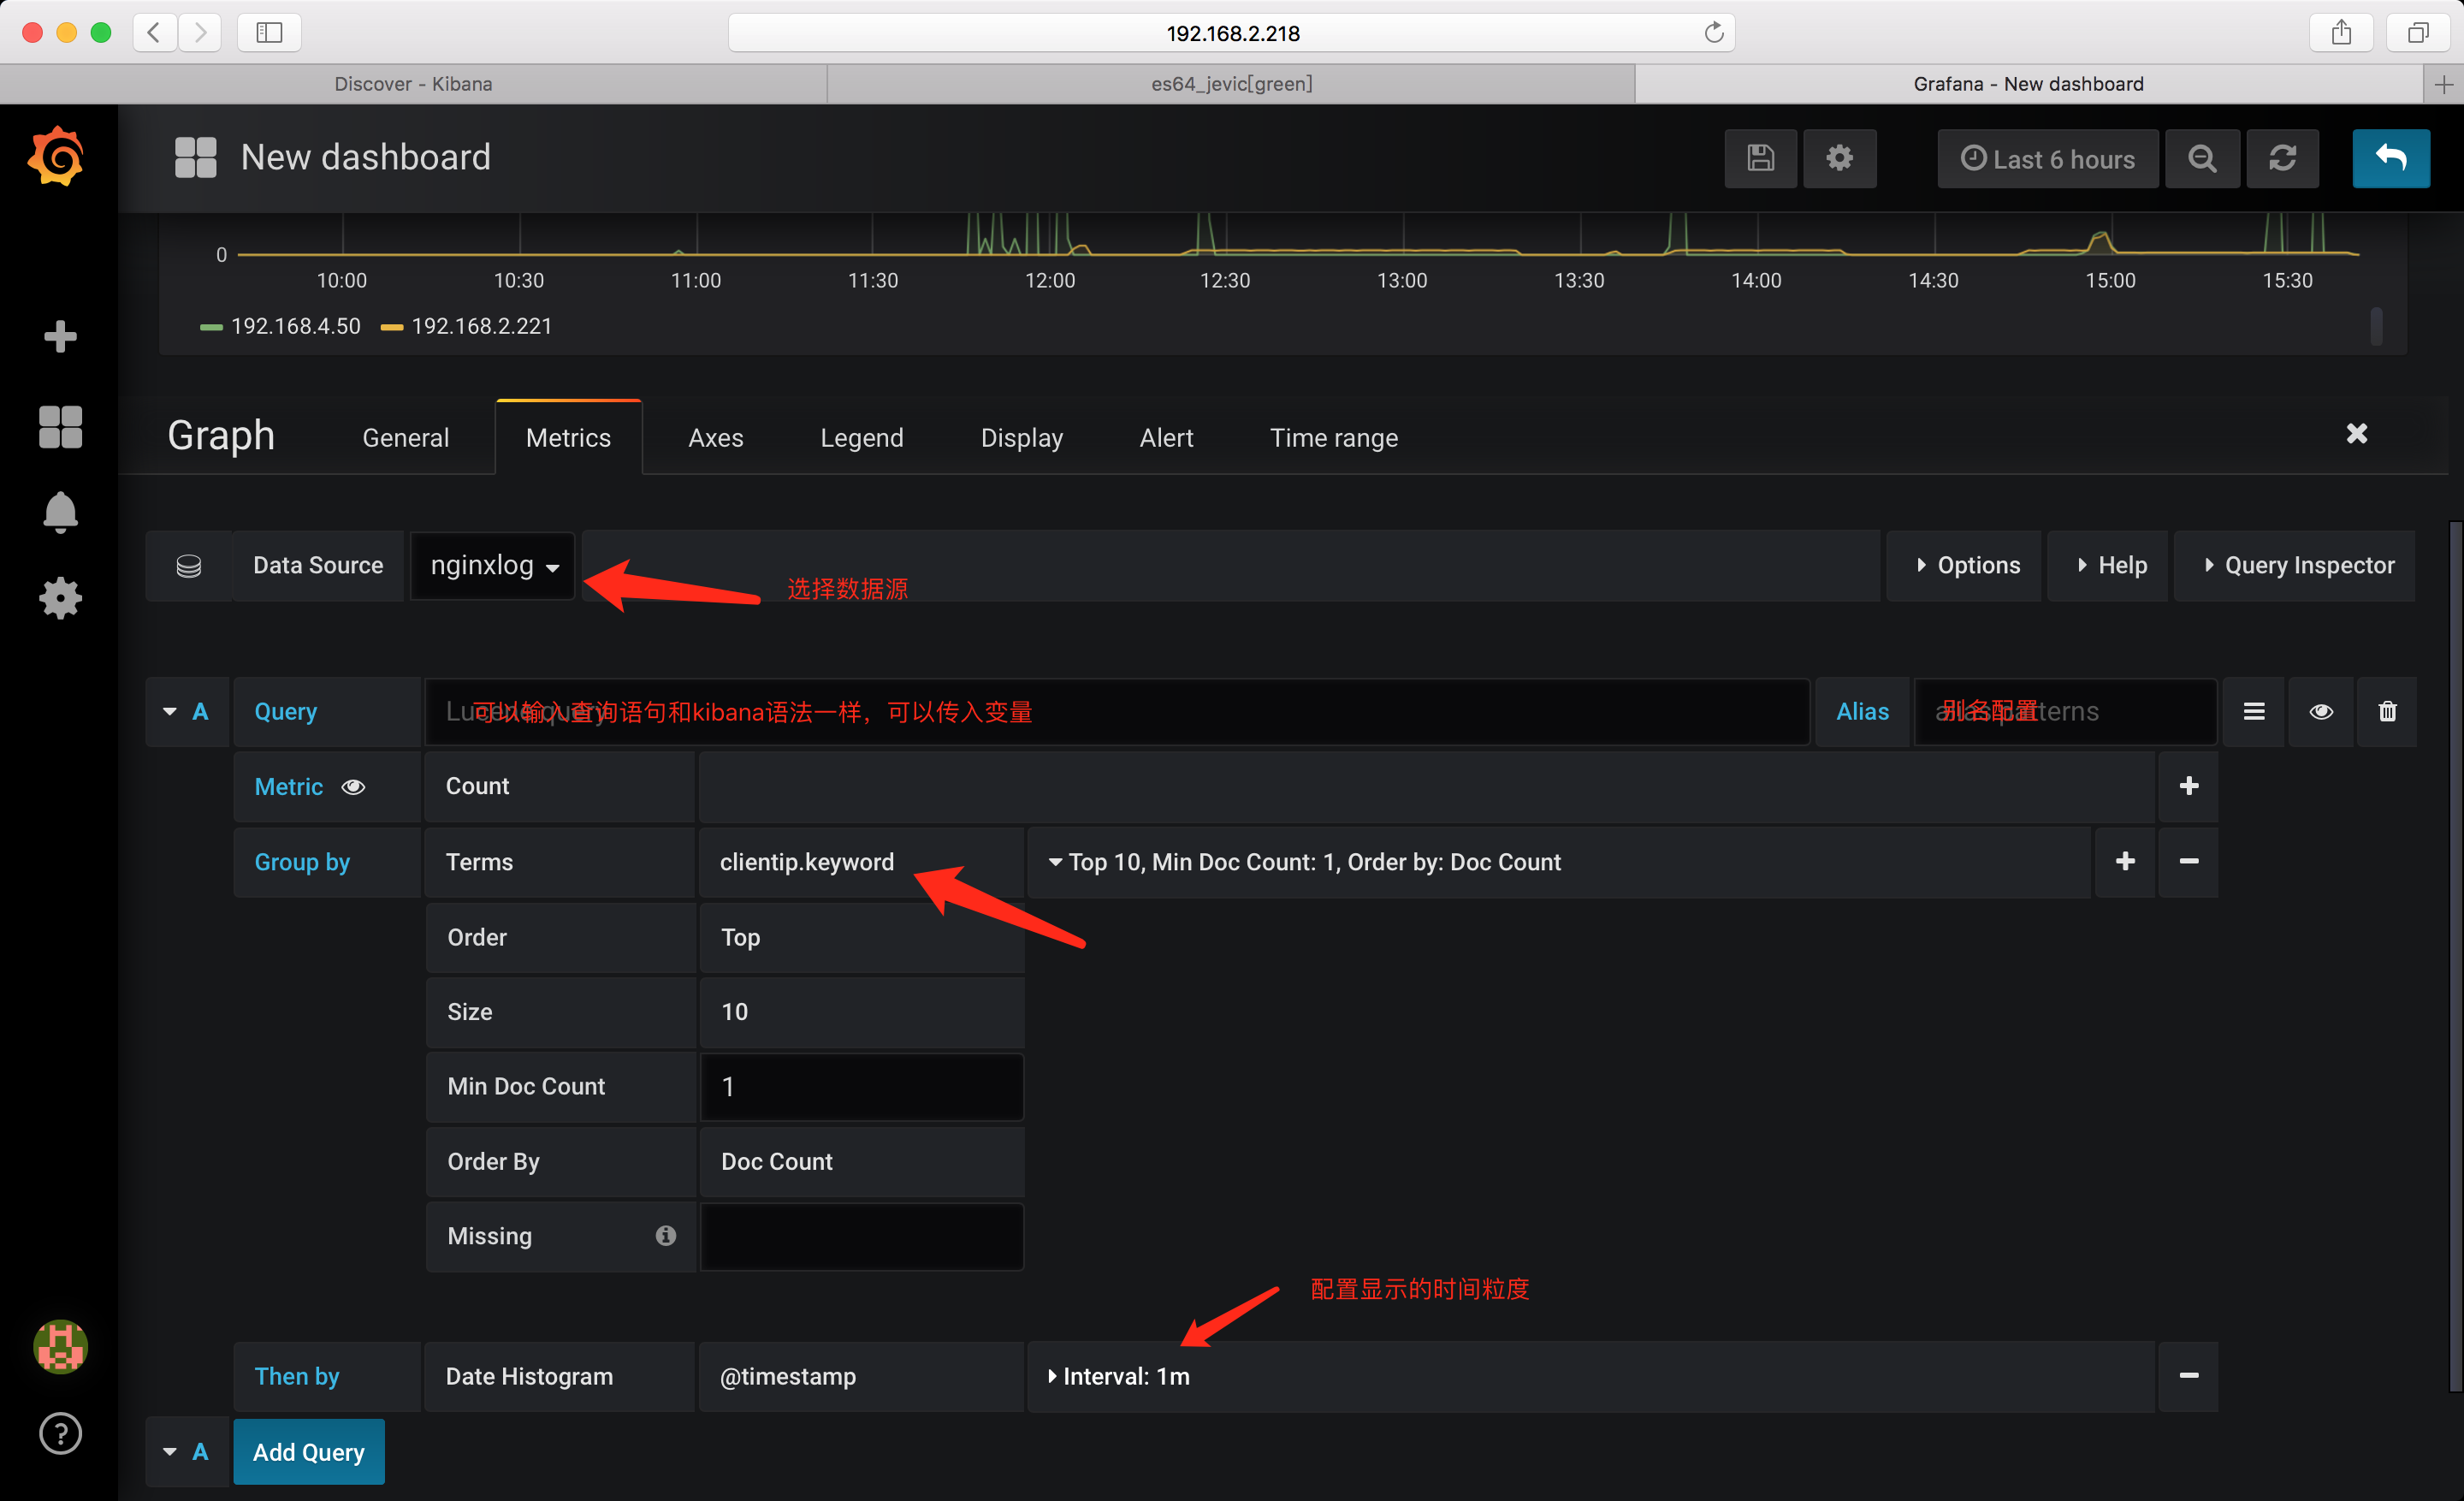
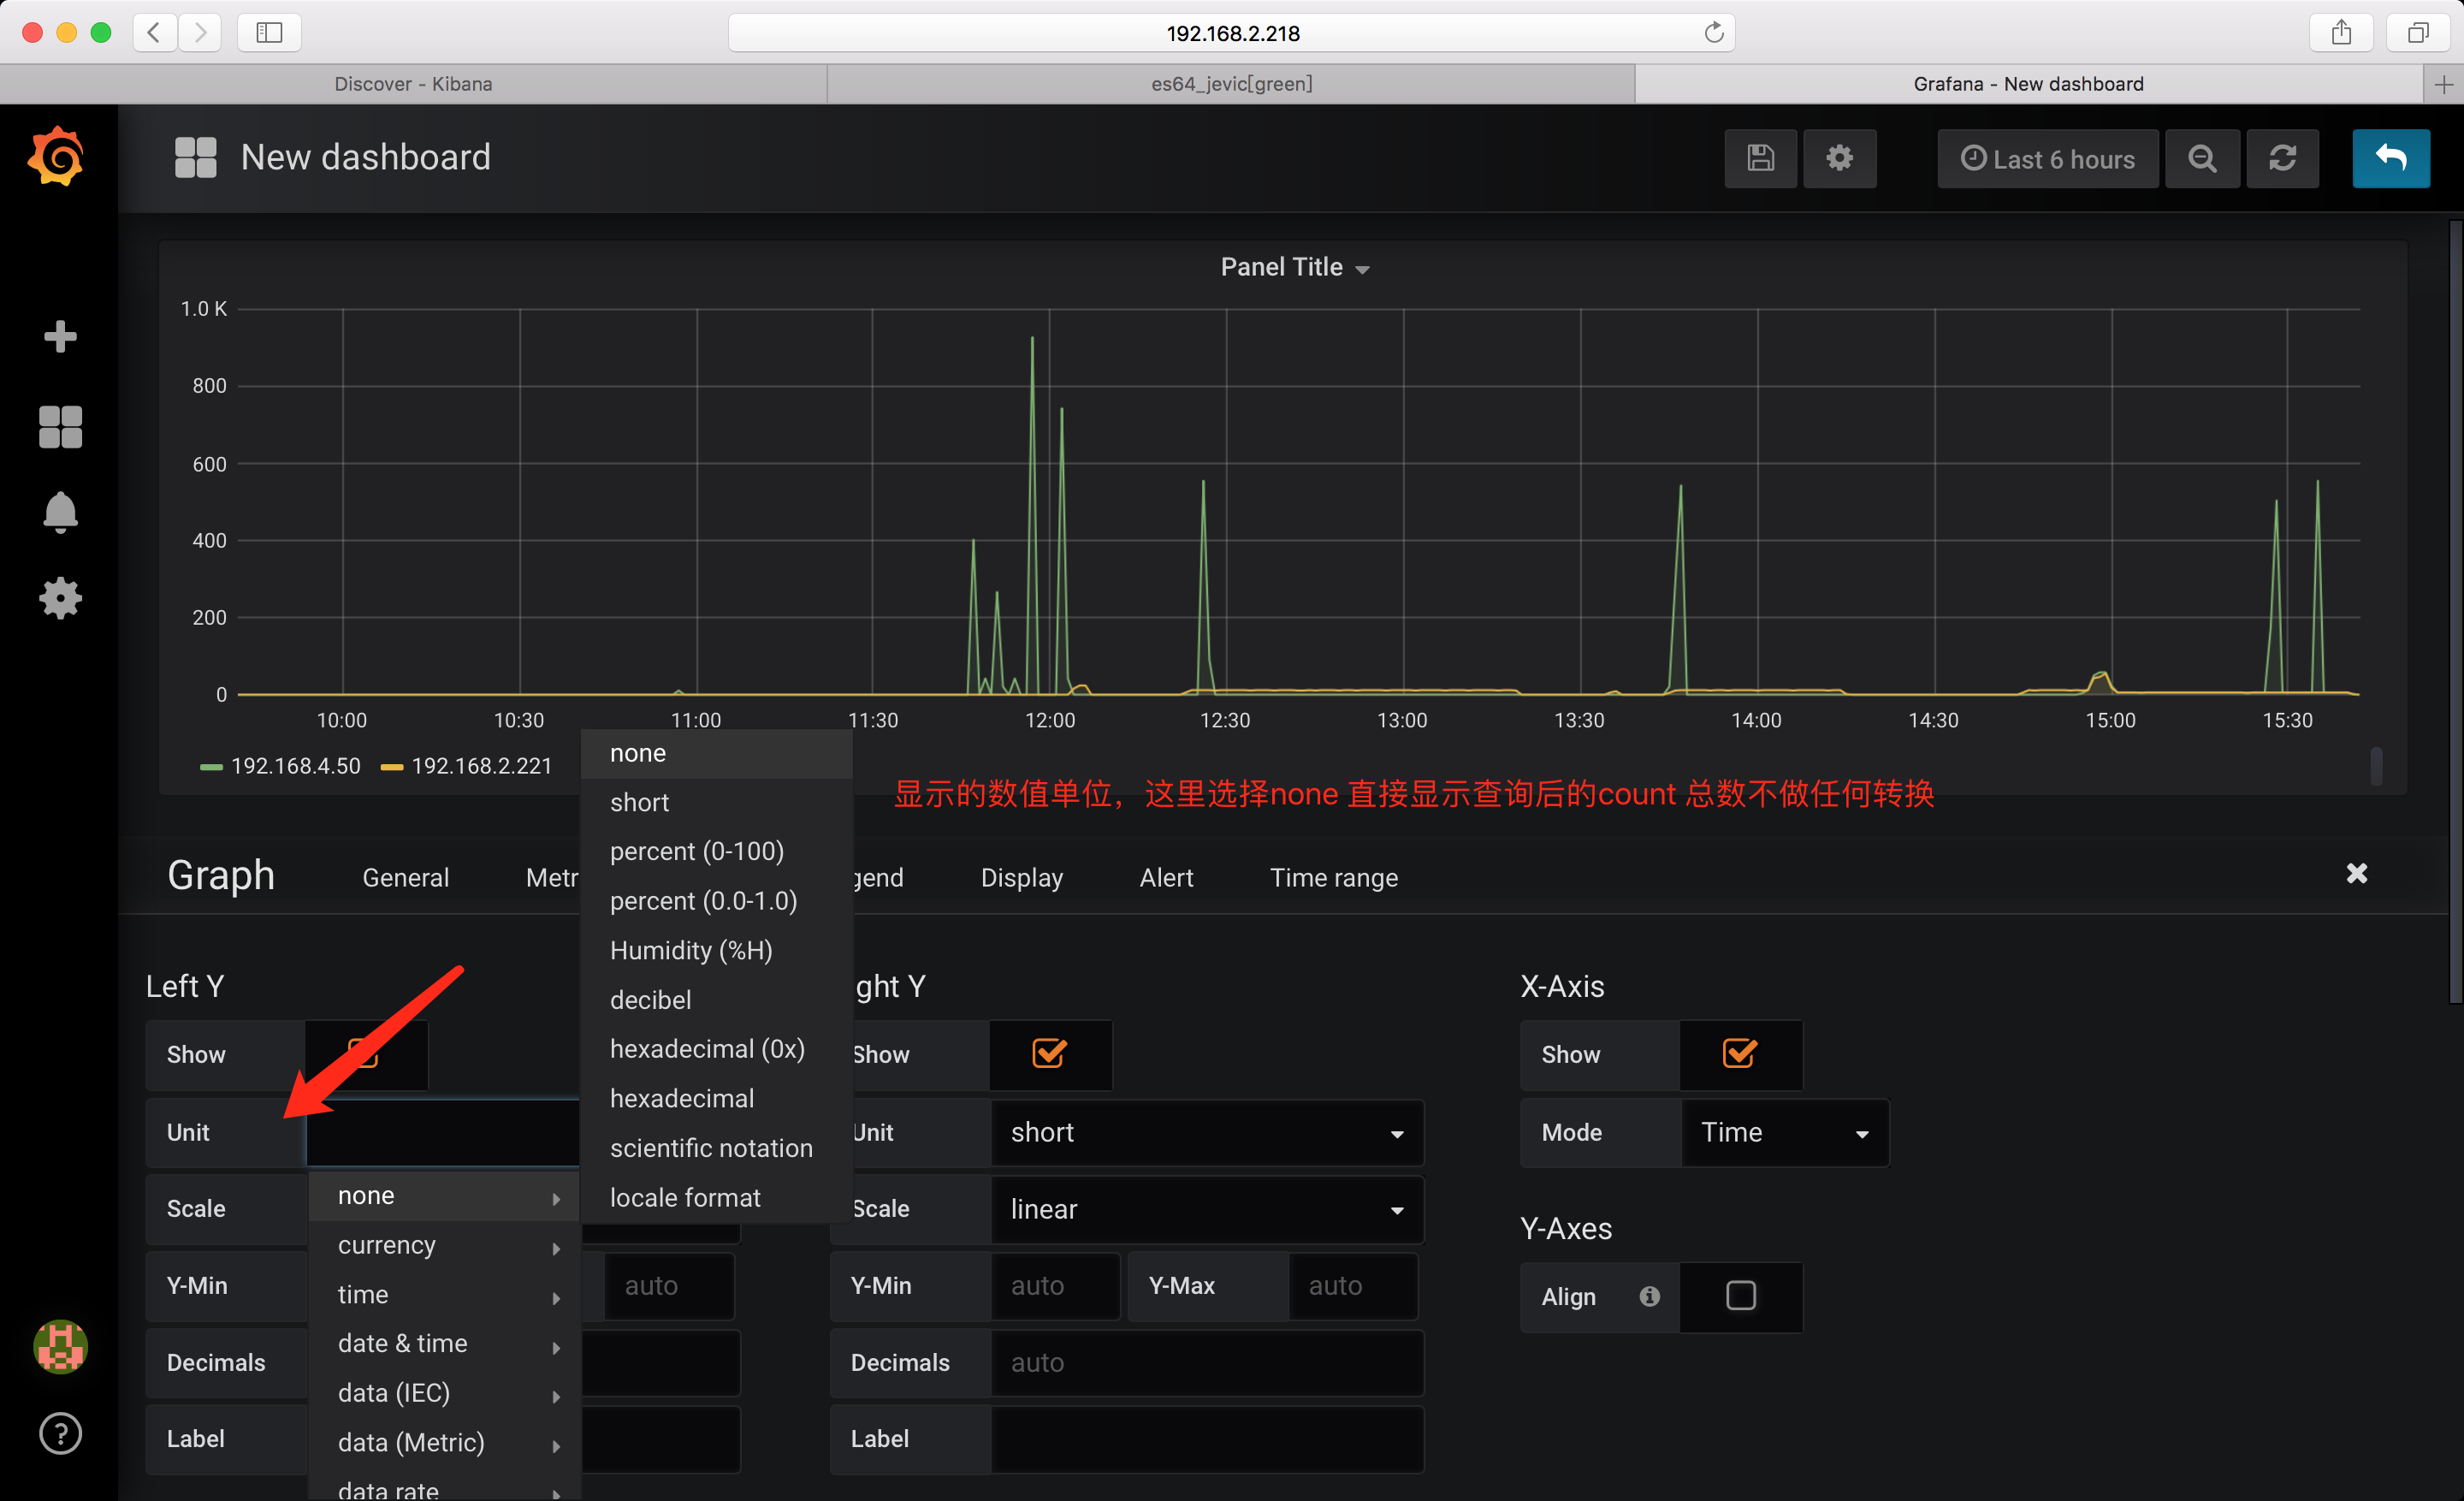
demo
需要注意的是: 对于nginxlog_* 这个索引. Group by 时写入的是 clientip.keyword; 因为没有指定字段类型,如果直接写入 clientip 则会报错无法显示;
变量
配置完成后,点击add 添加即可
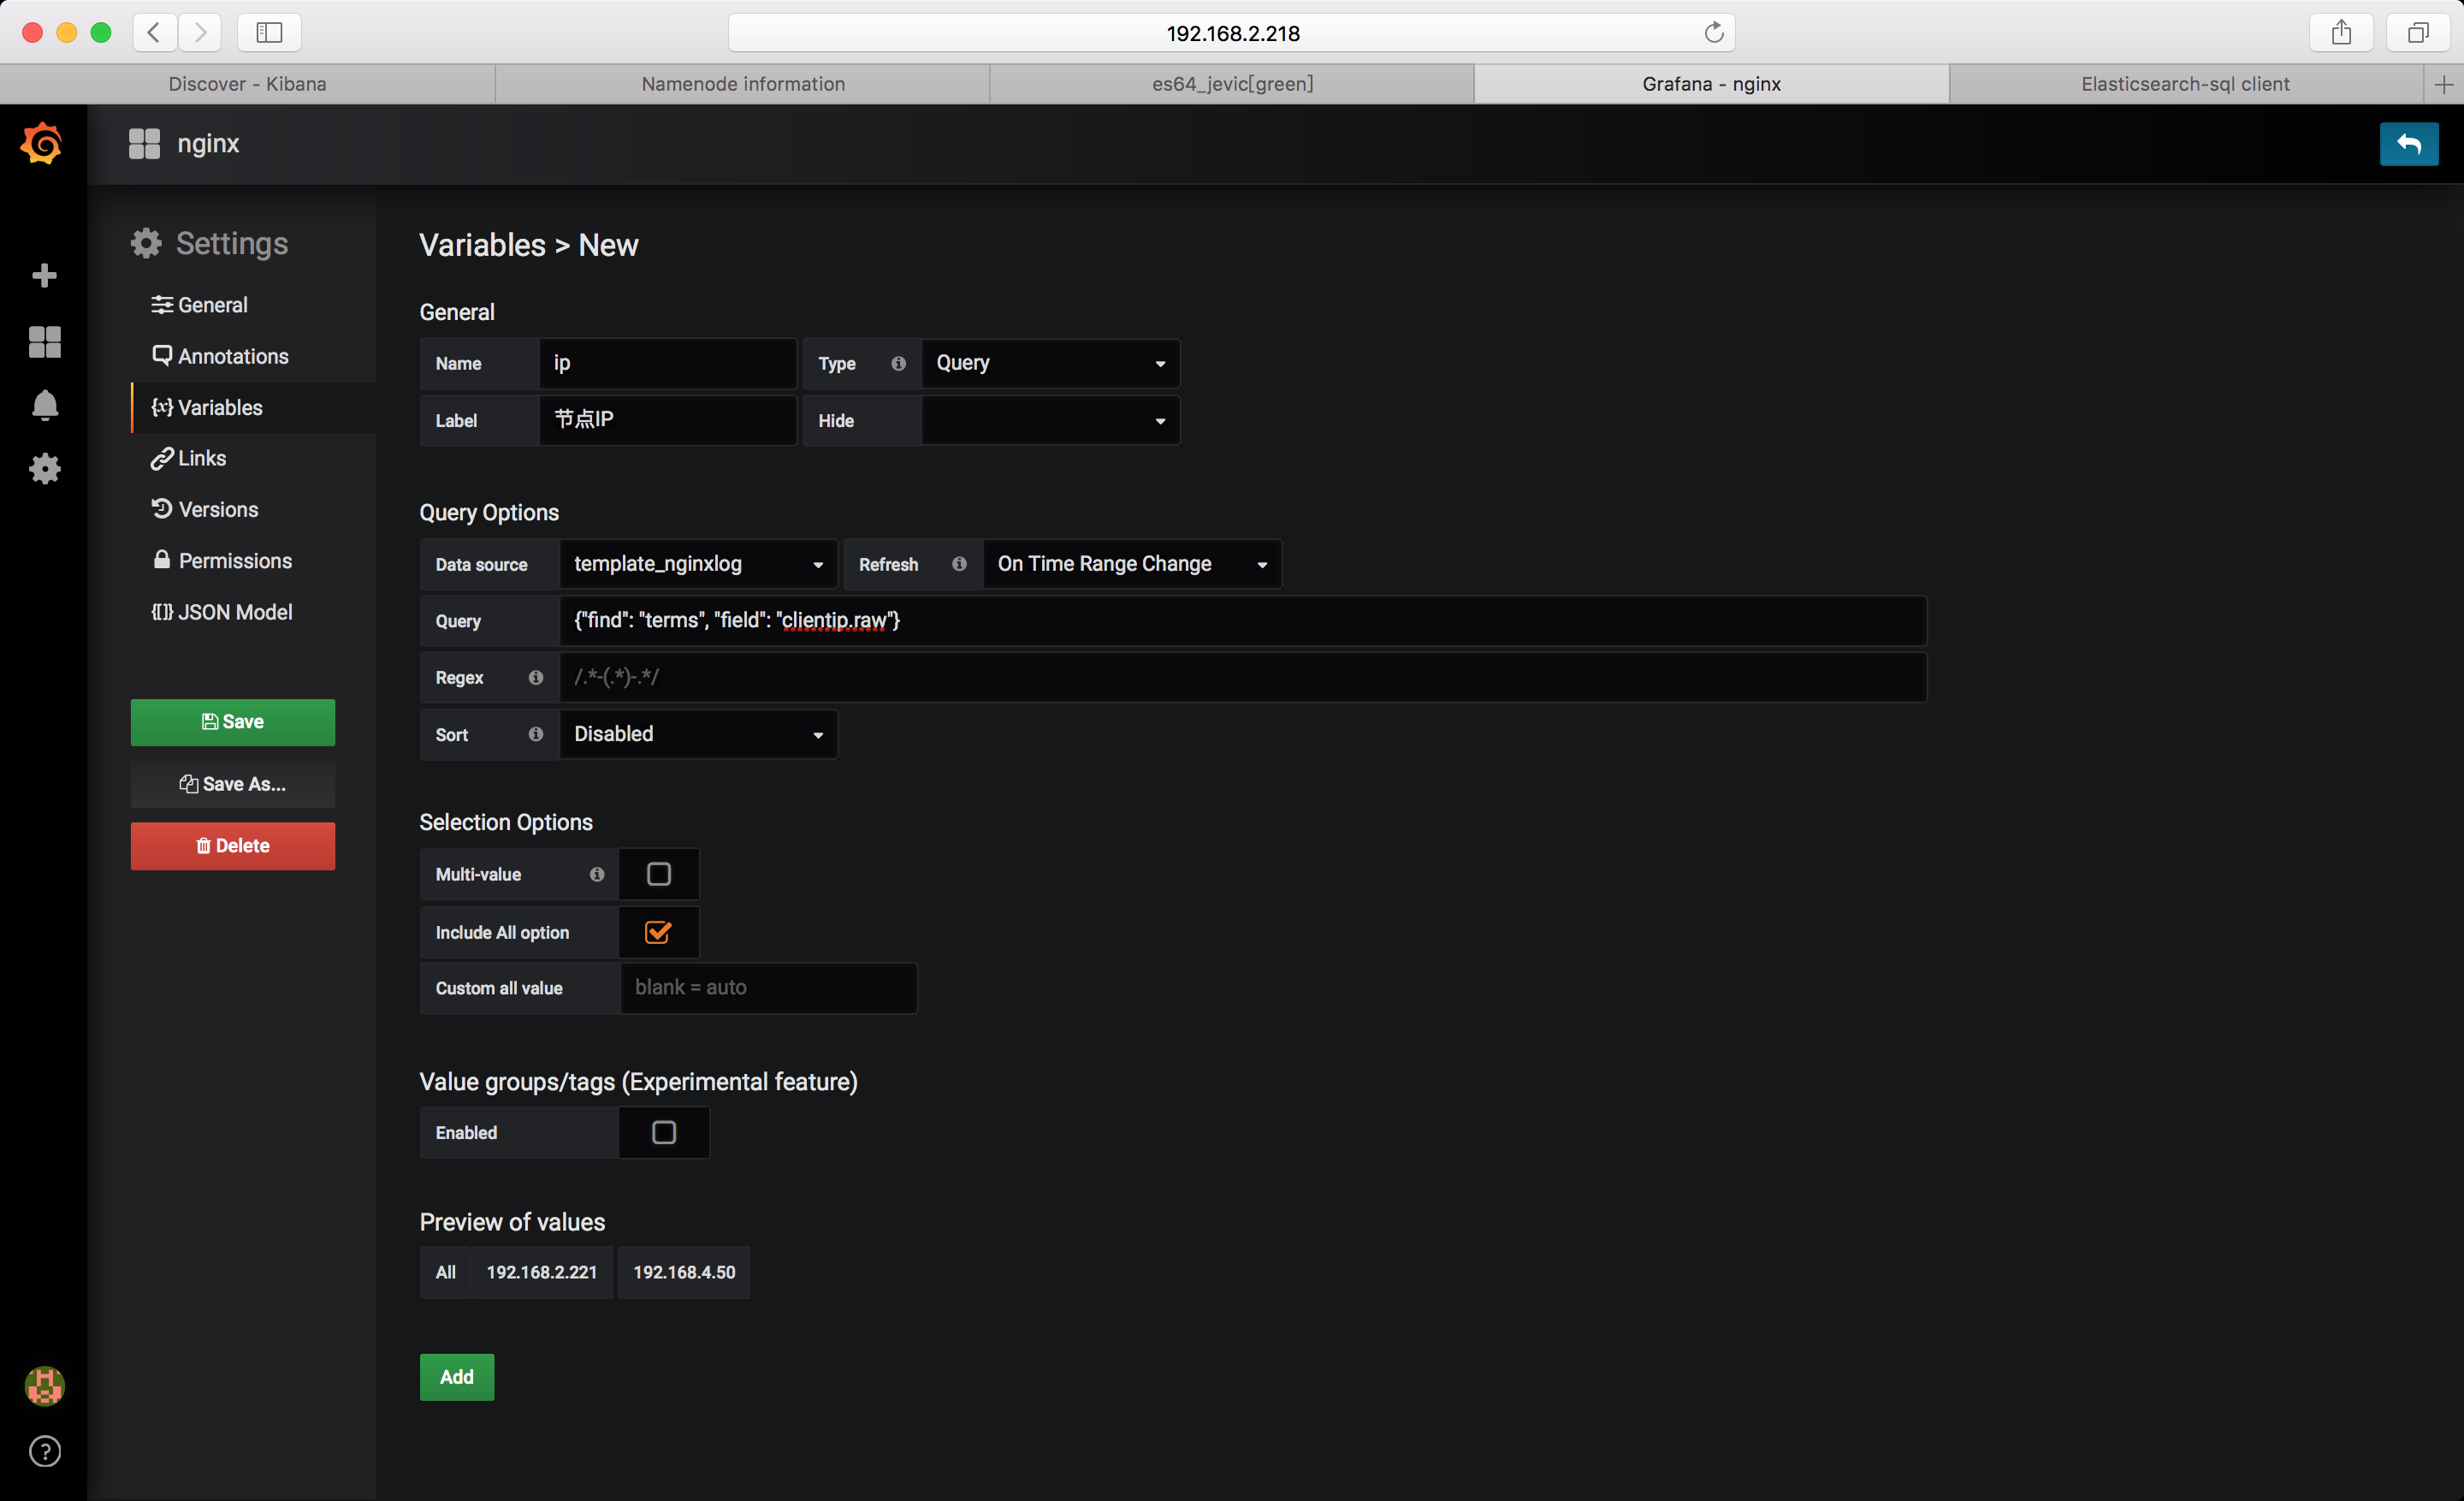

变量引用,和shell 变量调用方式一样使用 ${变量名}即可
clientip: $ip
注意: 这里Group by 时状态码字段 直接指定为: status 即可 因为根据前面我们的配置,对testnginxlog-* 索引模板中指定了字段类型
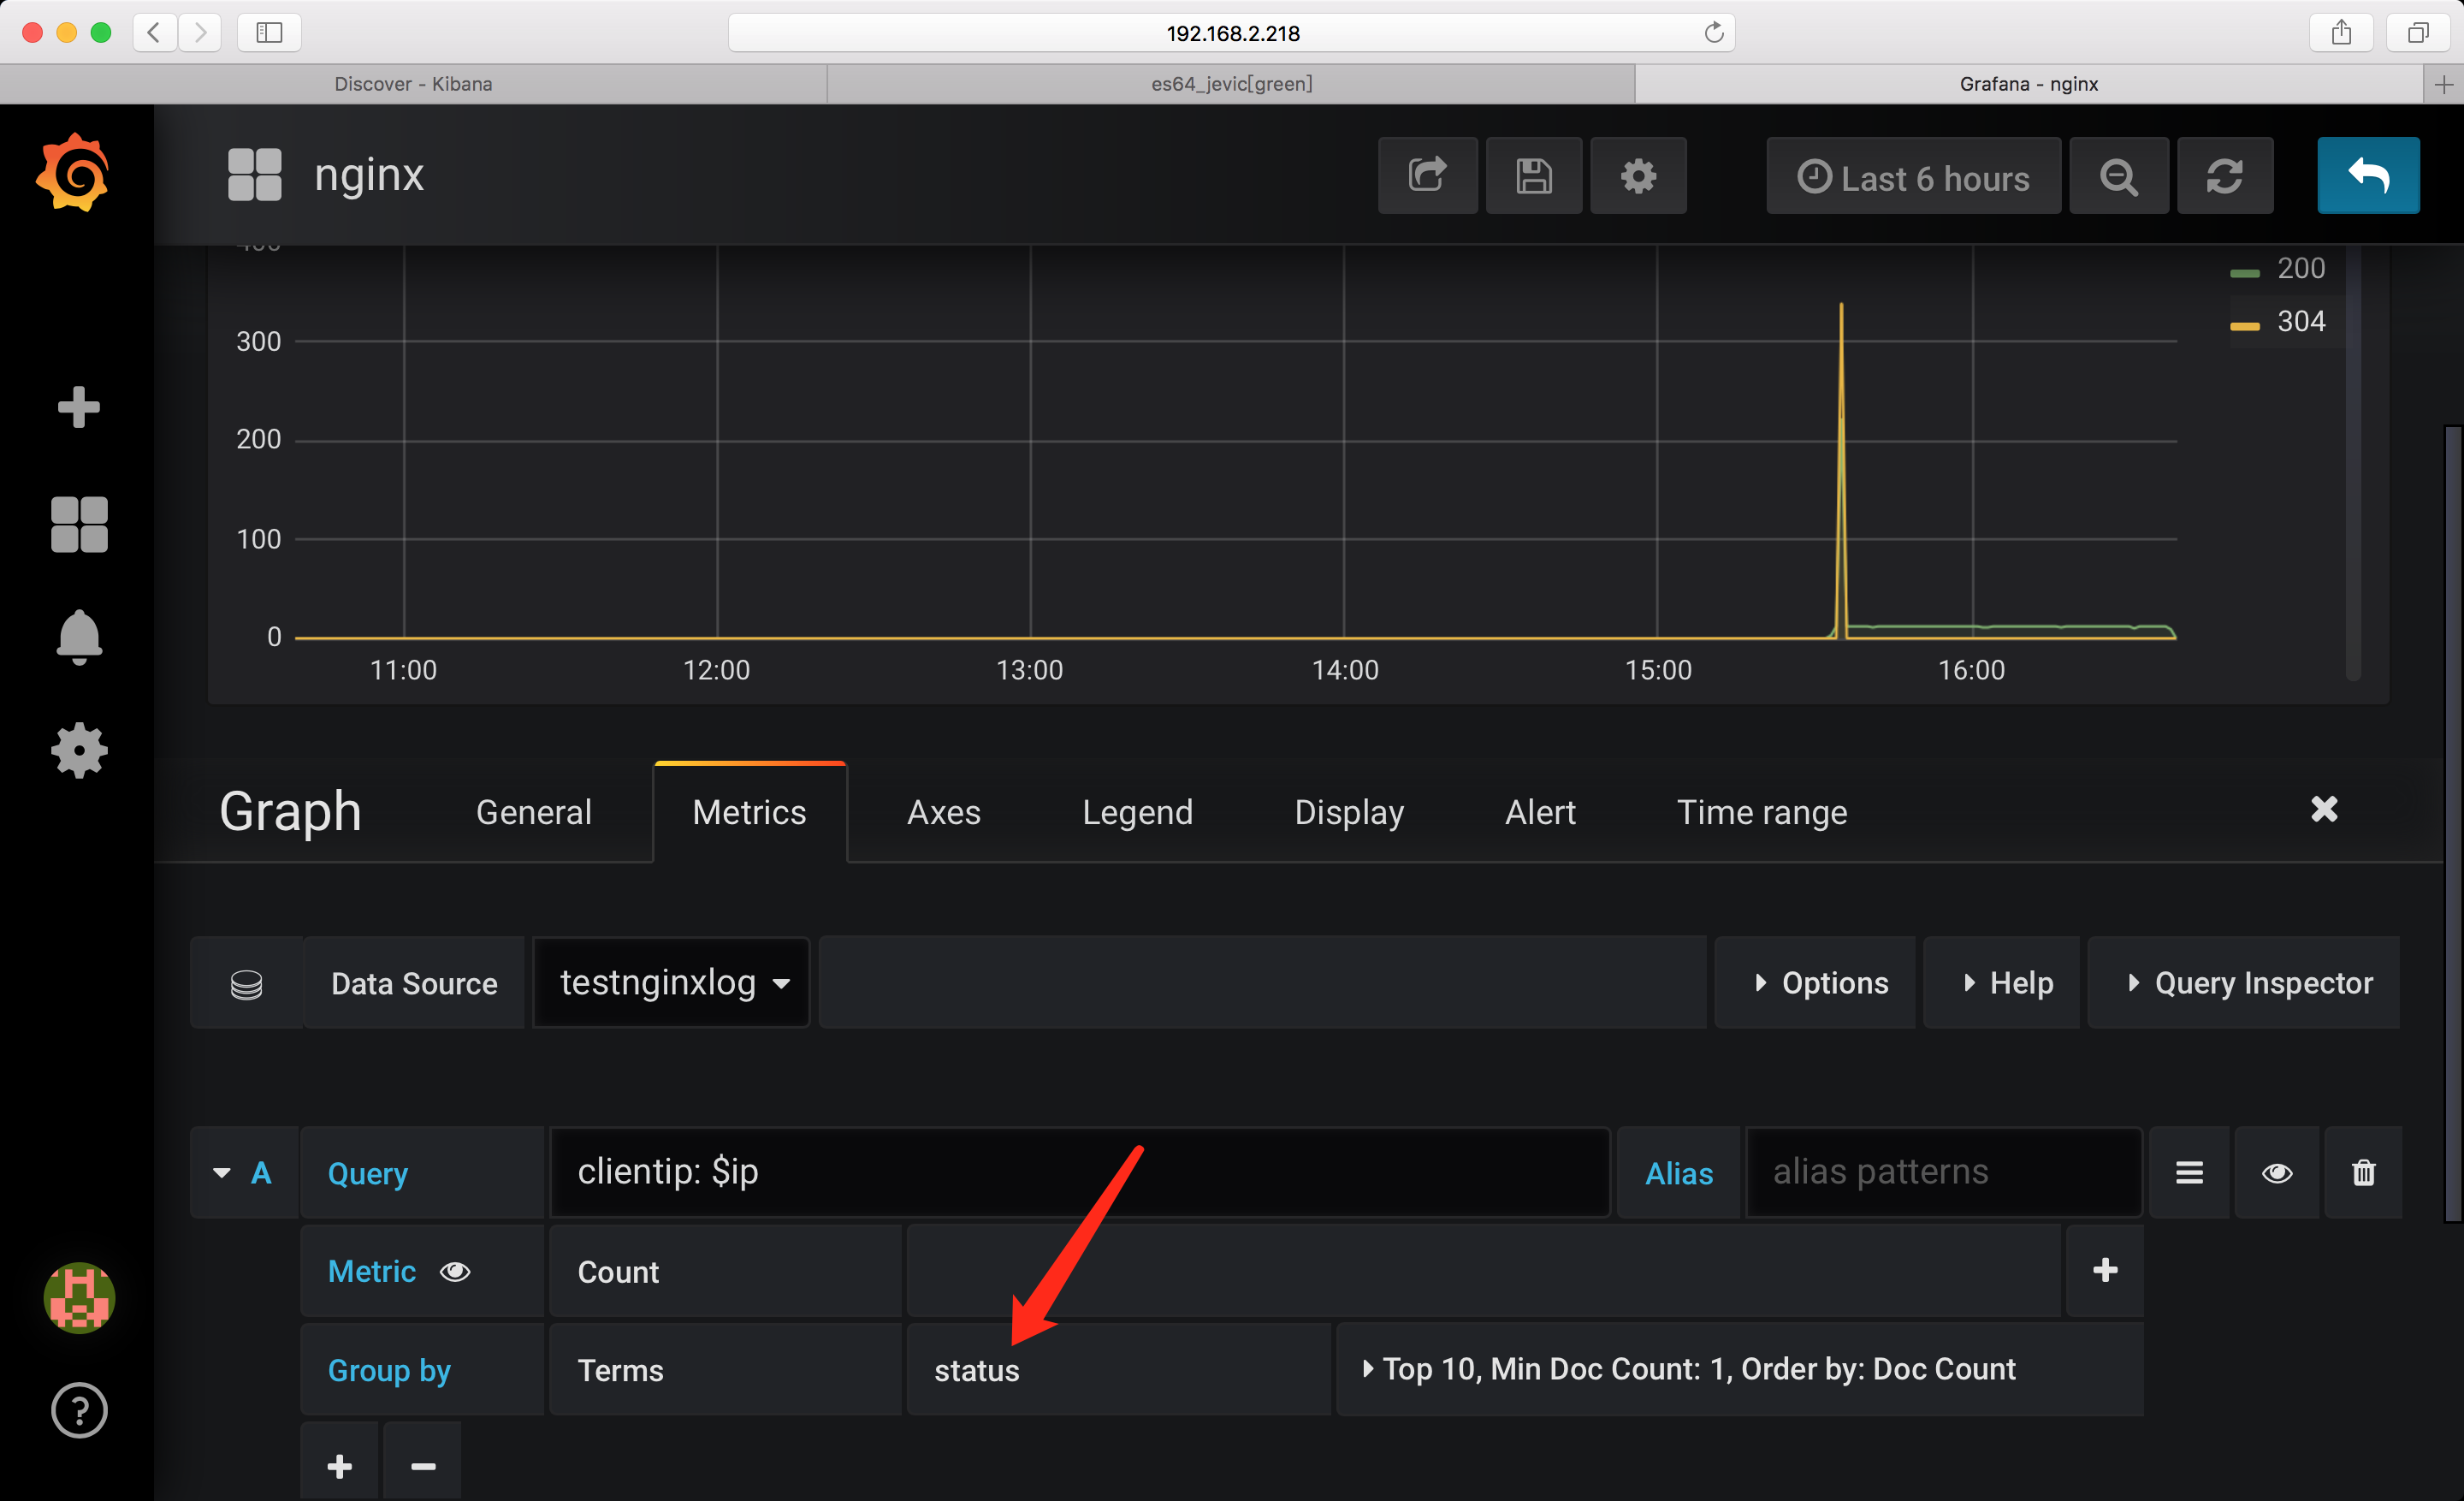
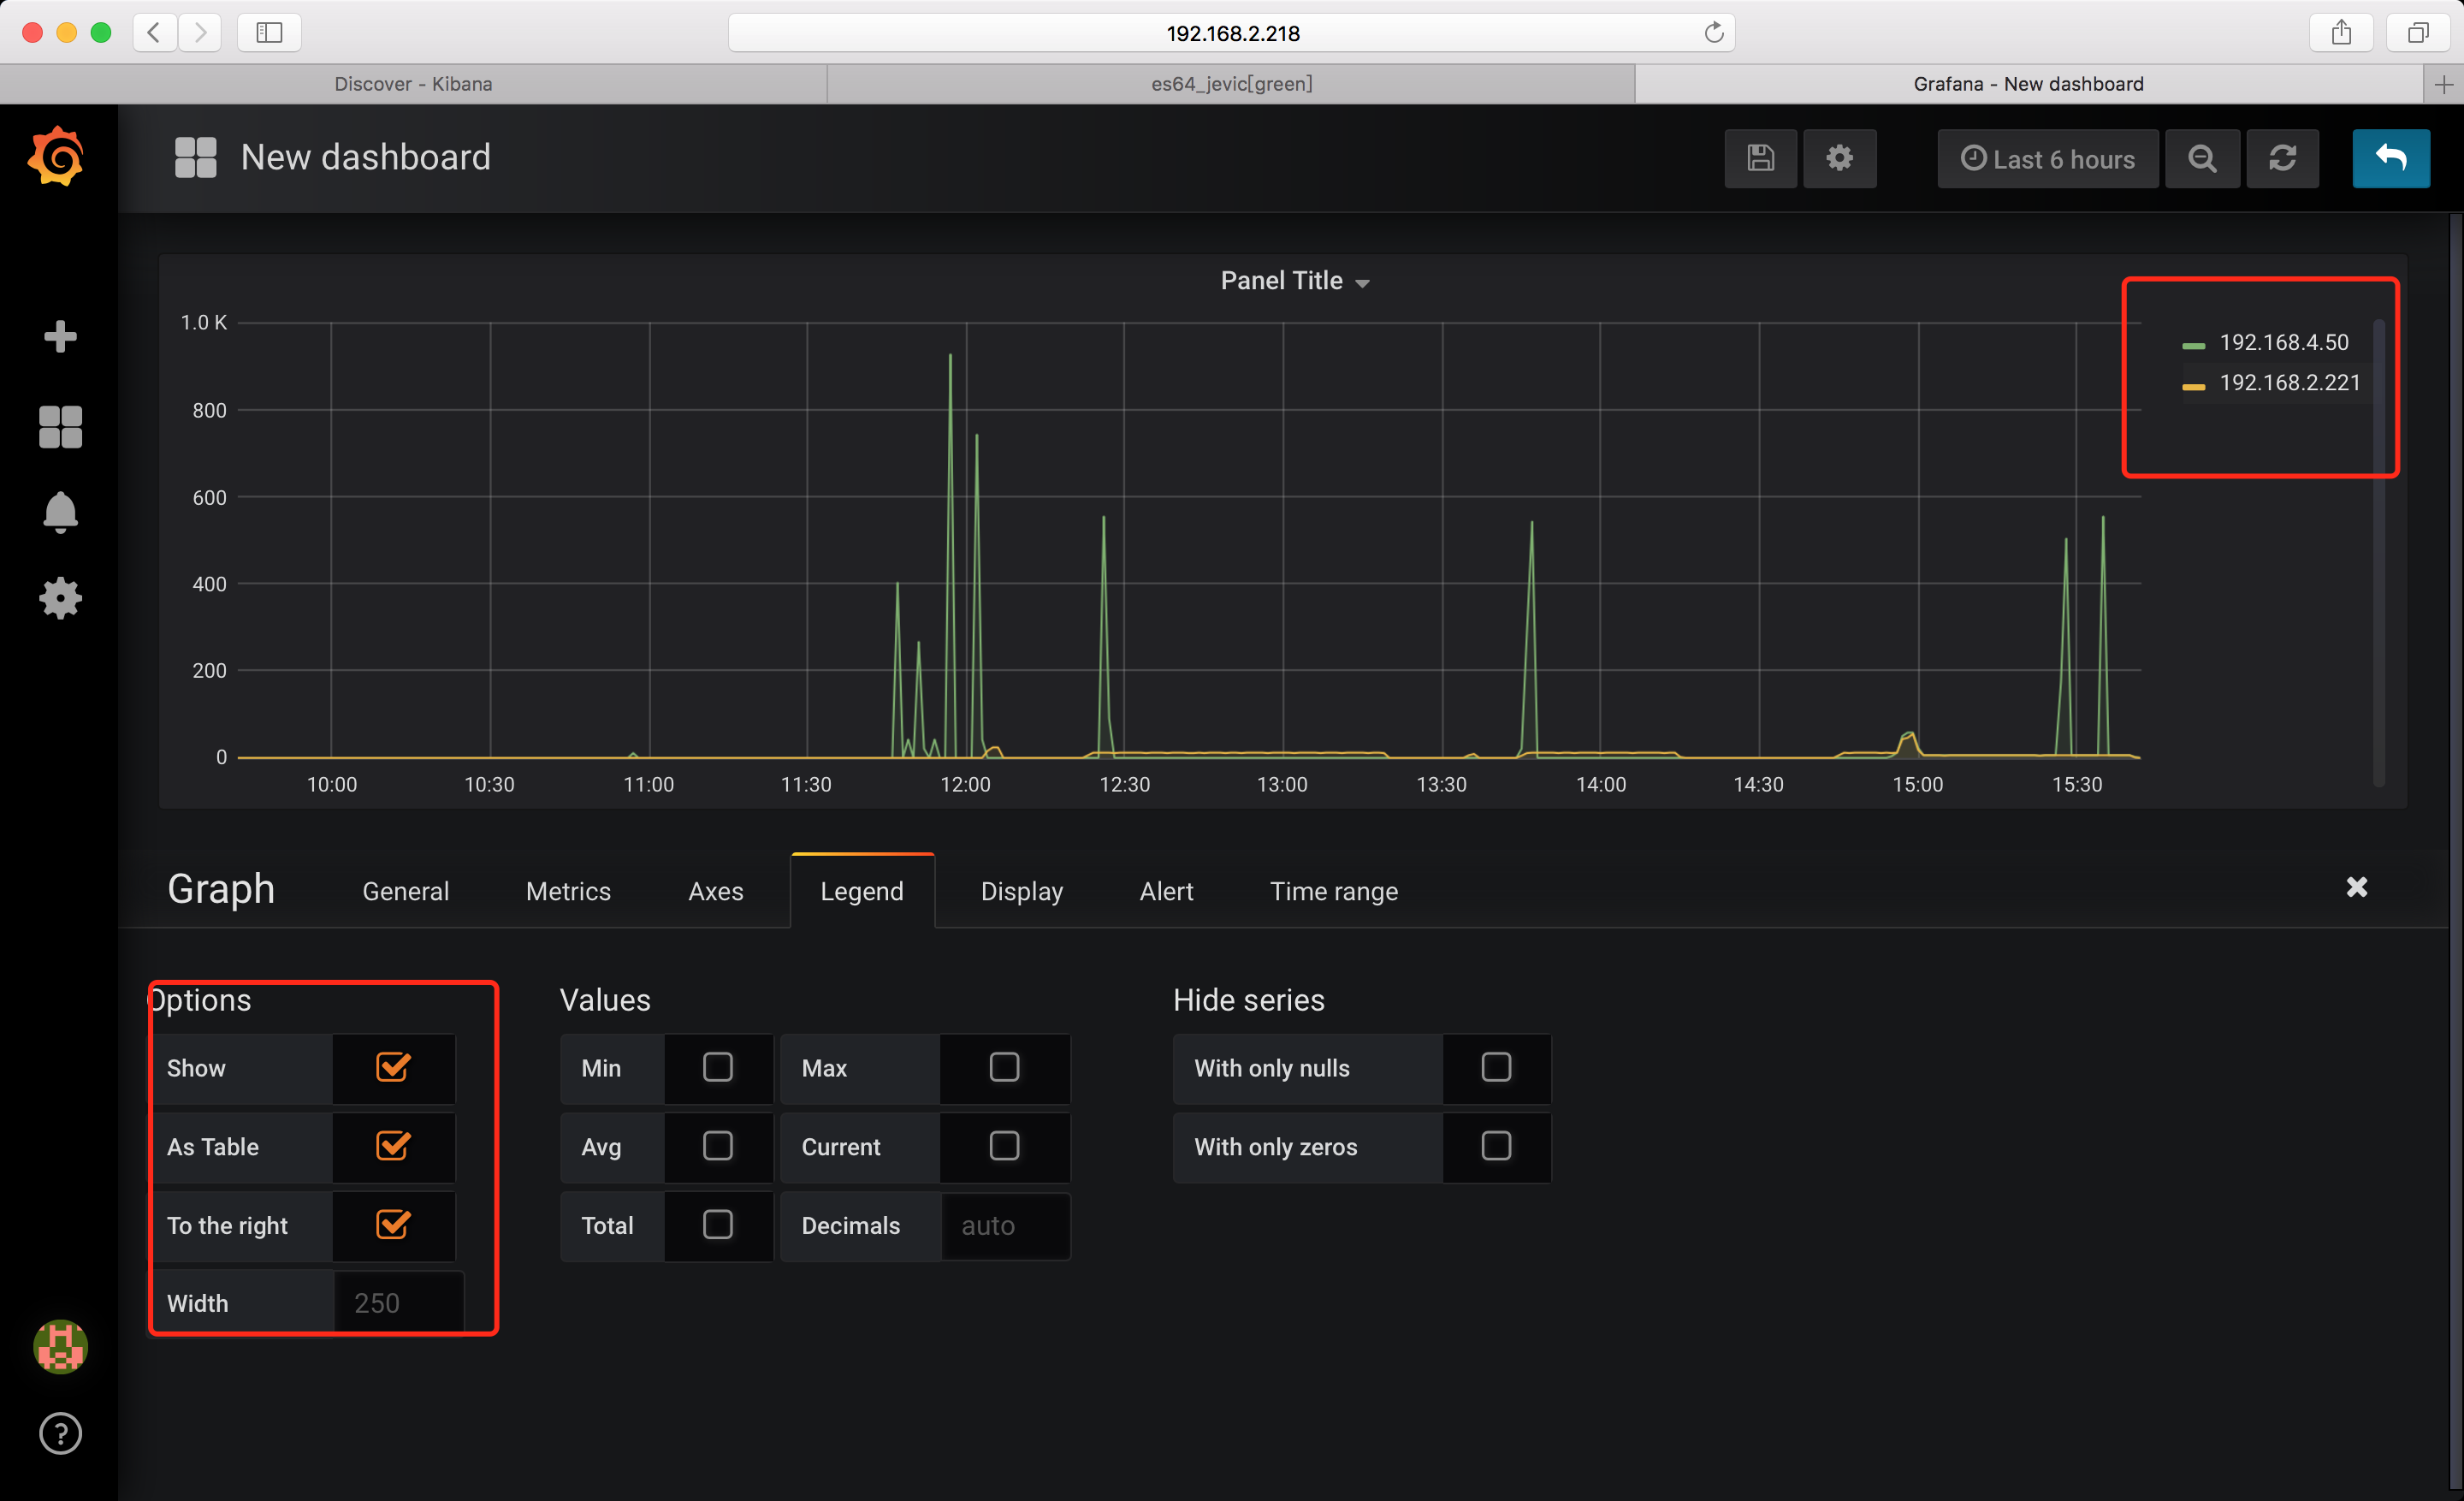
图表展示: